Showing posts with label Hong Kong cuisine. Show all posts

Tuesday, February 25, 2020

Pineapple Beef on rice 菠蘿炒牛肉


This is a very common dish in Hong Kong where you can easily find it in 'Cha Chaan Teng'.  Making it at home is also very simple and straightforward.  If you want to pull out a quick but healthy meal for the family during the week, it is a wonderful dish.  I'd say it's a children's favourite.

However, the enzyme in pineapple break down the protein in meat very quickly, so try to serve right after cooking.  Otherwise, the meat is going to be mushy.

INGREDIENTS:
1 Pineapple, ripened (you can use canned pineapple)
1 piece of Steak
2 tablespoons Chinese Cooking Rice Wine
1 tablespoon Sugar
2 tablespoons Vegetable Oil
Steamed Rice (for serving)
Check out here to see how to cook rice in a pot

MARINADE:
1 Egg
2 tablespoons Soy Sauce
2 tablespoons Chinese Cooking Rice Wine
1/3 teaspoon White Pepper Powder
1 tablespoon Sugar
1/2 teaspoon Cornstarch
1/3 teaspoon Salt

DIRECTION:
1. Slice the beef into about 1/2 cm thick pieces.  Add them in a mixing bowl.  Combine them with the marinade.  With hand, mix it gently until the liquid is absorbed by the meat.  Set aside and allow it to marinate for about 20 minutes.

2. Cut off both ends of the pineapple.  Stand it up.  Cut the skin off from top to bottom along the curve of the pineapple.  Cut off and discard the hard core.  Then, cut the pineapple into bite size.  (You don't want the pineapple to be too small because it will produce too much liquid during cooking).  Set the pineapple aside.

3. Heat up the oil in a large pan over high heat.  Add the beef.  Stir fry until the beef starts to turn colour; about 2-3 minutes.  Add rice wine and sugar.  Stir fry for another minute.

4. Add the pineapple.  Quickly stir fry until the beef is medium-rare and the pineapple is heated through.  Transfer the mixture to the serving plate and serve it with steamed rice.


Tuesday, January 29, 2019

Vegan Chinese Turnip Cake (Lo Bak Go) 純素蘿蔔糕


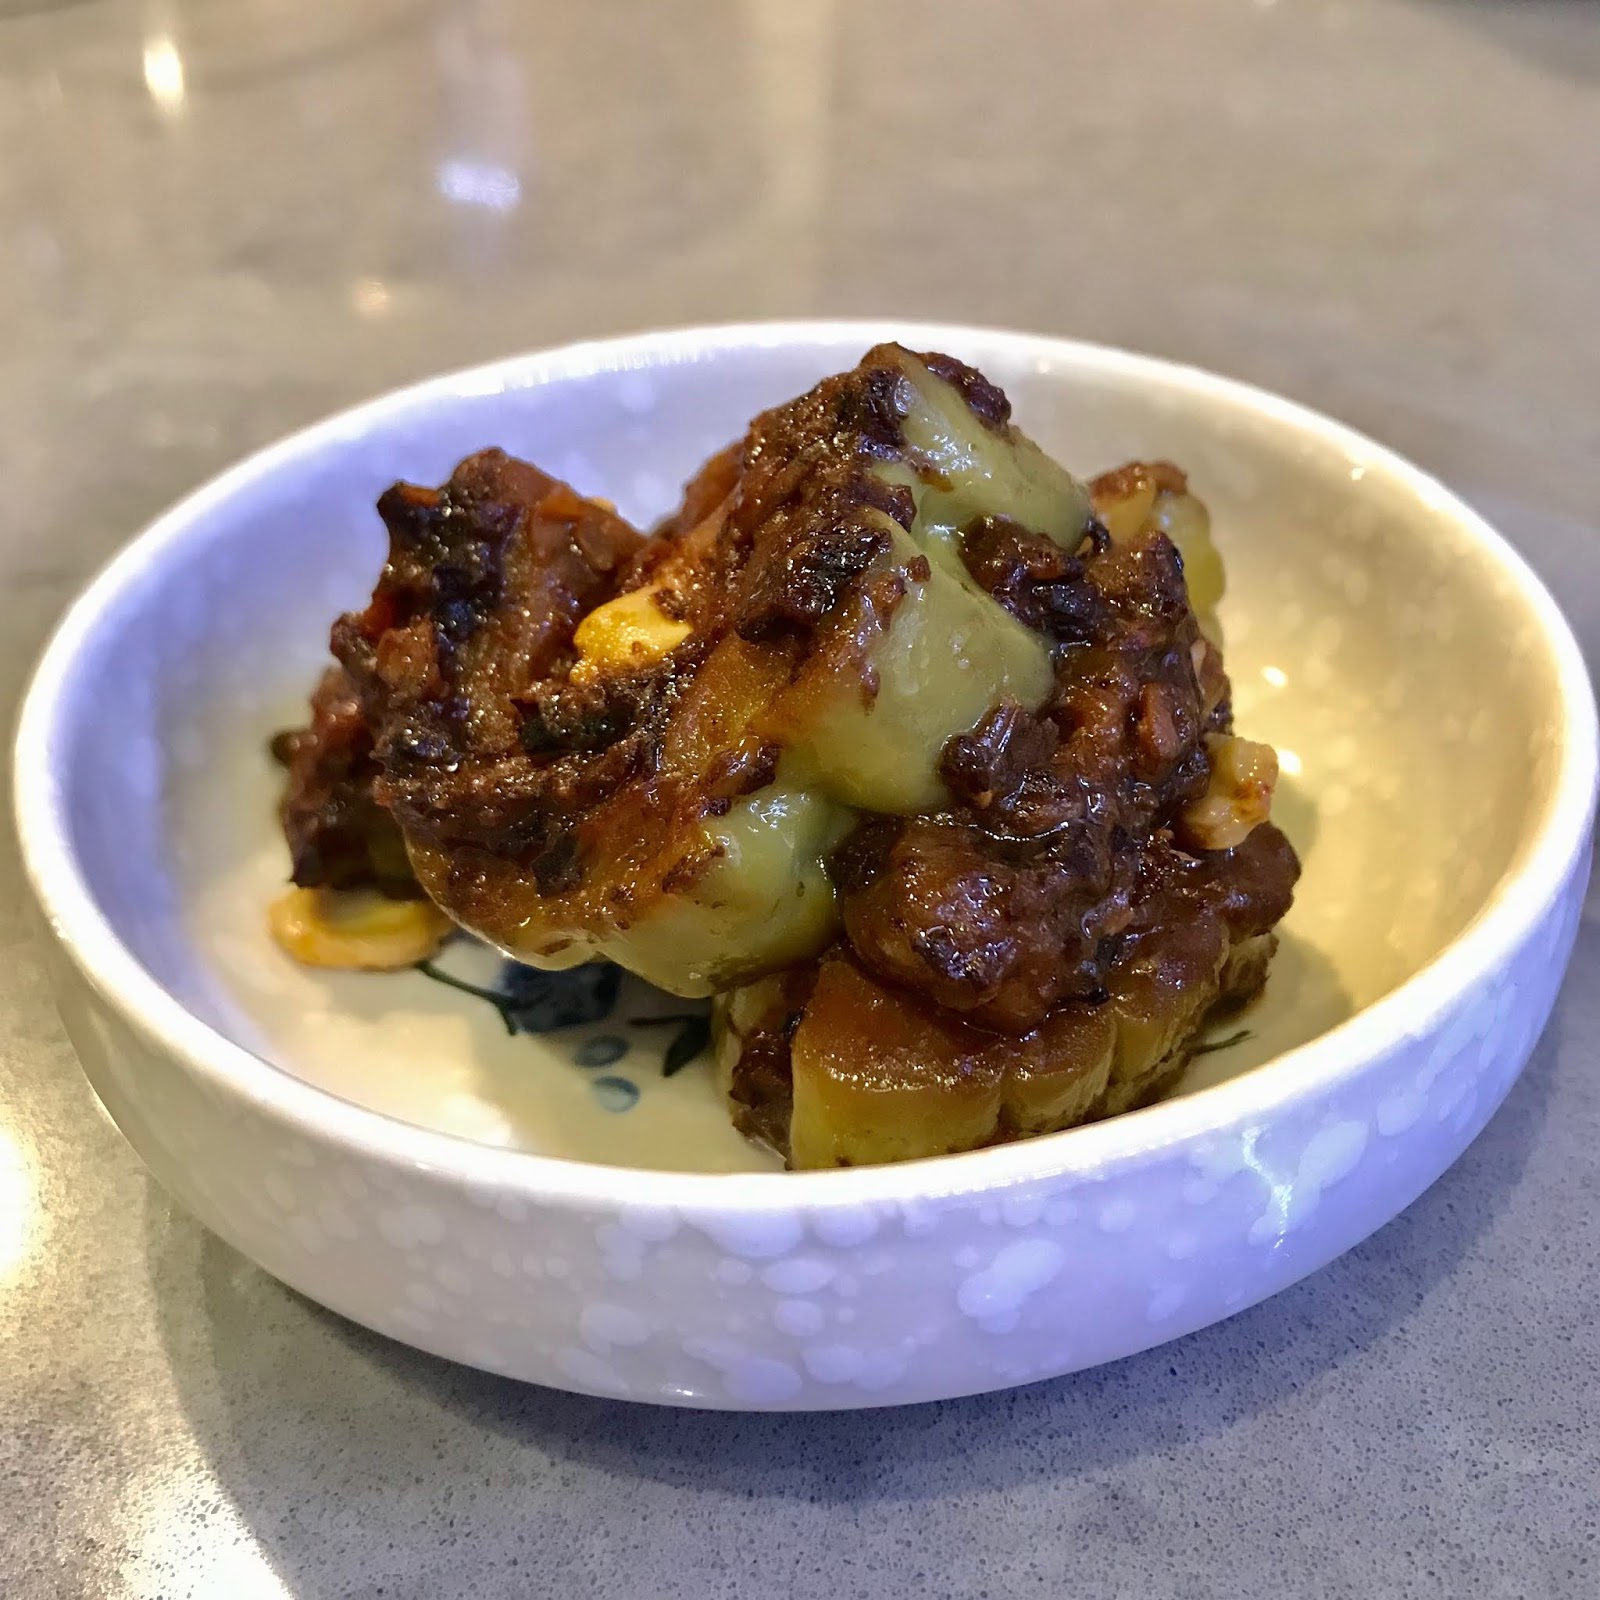
Turnip Cake is a savoury celebrated food we eat at Chinese New Year.  Traditionally, it is made of fresh turnip and lots of preserved meat.  However, I don't digest meat well.  So I made this vegan version, and I would say it tastes as wonderful as the traditional one.

This recipe relies on the strong flavour of the water reserved from the rehydration of the shiitake mushrooms and daylily.  So please do not substitute it with fresh water.  Otherwise, the flavour of the cake will be compromised. Also, the mushroom stems are edible although they are usually harder in texture.  Try to soak the mushrooms overnight to help soften the stem before using them.

INGREDIENTS:
1 Chinese Turnip, peeled and grated (about about 4 cups after grated)
15 Dried Shiitake Mushrooms
1 cup Dried Daylily
2 cups Dried Wood Ears
1 cup Preserved Radish
5 stalks Green onion, thinly sliced
1 head Garlic, peeled and minced
2 inches long Ginger, peeled and minced
2.5 cups Tsai Lai Rice Flour
1/4 cup Vegetable Oil

SEASONING:
5 tablespoons Light Soy Sauce
3 tablespoons Chinese Cooking Shaoxing Wine
1 tablespoon White Pepper Powder
1 tablespoon Roasted Sesame Oil
1 teaspoon Salt
3 tablespoons Sugar

材料:
1 條  白蘿蔔 (刨絲後約4杯)
15 朵  乾冬菇
1 杯  金針
2 杯  乾木耳
1 杯  菜脯
5 棵  蔥
1 頭  蒜頭,去皮,磨蓉
2 吋長  薑,去皮,磨蓉
2.5  杯  在來米粉
1/4 杯  菜油

調味料:
5 湯匙  豉油
3 湯匙  紹興酒
1 湯匙  白胡椒粉
1 湯匙  麻油
1 茶匙  鹽
3 湯匙  糖

DIRECTION 做法:
Prior to cooking 預備功夫...
1. Soak shiitake mushrooms in water until they are rehydrated.  Then, wash off the sand on the mushrooms using the water they are soaking in (not fresh water).  Squeeze the water from the mushrooms and dice them.  Reserve the soaking liquid.
1. 乾冬菇浸水至軟身。在浸過冬菇的水中把沙粒從冬菇洗出,擠乾水份,留起浸過的水。把冬菇切幼粒。

2. Add the dried daylily in the preserved soaking liquid to rehydrate until they are soft.  Squeeze out and preserve the liquid again for later use.  Rinse the daylily under running water.  Cut off and discard the hard ends, and cut the daylily into small pieces.  Set aside.
2. 把金針放到浸過冬菇的水中浸至軟身;擠乾水份,浸過的水留起備用。金針過水洗淨,切去尾部較硬的部份,再把金針切成小段。

3. Meanwhile, soak the dried wood ear in warm water until they are rehydrated.  Discard the water.  Rinse off the sand from the wood ear under running water.  Cut and discard the hard stem of each wood ear and chop it into small pieces.  Set aside.
3. 同時間,木耳在另一只碗水用暖水浸軟。把水倒掉,木耳用水洗淨。把木耳切成小粒。


4. In a large bowl, filer the preserved liquid through a piece of kitchen paper.  
4. 在一只大碗中放上一塊廚紙,慢慢倒入浸過冬菇和金針的水,讓廚紙濾去水中的雜質。


5. 把在來米粉加入濾過的水;拌勻至幼滑。
5. Combine Tsai Lai rice flour and the liquid; mix well.  The mixture should be runny.


6. Brush a layer of vegetable oil on the steamed mold.
6. 在焗模上掃上一層菜油。


Cooking 煮法...
7. In a large non-stick pan, heat up vegetable oil over high heat.  Add mushrooms, daylily, wood ears, ginger and garlic.  Stir fry until they are fragrant and soft; about 10 minutes.  Add all the seasoning.  Continue to stir fry until it is well mixed and the sauce is absorbed.  
7. 在一只易潔鍋中,用大火燒熱菜油。加入冬菇、金針、木耳、薑和蒜。炒至香氣四溢和軟身;約10分鐘。下調味料;繼續炒至汁收乾。


8. 把冬菇料倒入一只碗中,加入蔥備用。
8. Transfer the vegetable mixture into a bowl.  Add the green onion in the bowl.


9. In the same pan, add about 2 tablespoons of vegetable oil.  Add grated radish.  Cook until the radish is totally soft and releases its liquid; about 10 minutes.
9. 在同一只鍋中,下2湯匙菜油。下蘿蔔絲,炒至其軟身和出水;約10分鐘。

10. Reduce the heat to medium-low.  Add the cooked vegetable mixture along with the green onion back to the pan; mix well.
10. 火調低至中低火。冬菇料回鍋,與蘿蔔絲拌勻。


11. Stir in Tsai Lai rice flour mixture.  Cook until the mixture is thick and paste-like; stirring consistently.  Remove the pan from the heat.
11. 倒入粉漿;繼續拌至呈漿糊狀; 離火。


12. Pour the mixture evenly into the muffin tin (or a tin tray).  Cover the tray with foil and place the tray on top of another bigger tray.  Fill the bottom tray with a thin layer of water.  Place it into the pre-heated oven.
12. 將粉漿平均倒入焗模,蓋上錫紙。把焗模放到另一只焗盤內,再倒入少許水。焗盤放進已預熱至360F的焗爐內。


13. Steam the lo bak go at 360F for about 25 minutes and they are ready.
13. 焗約25分鐘便完成。

Kung Hei Fat Choy!  Happy Chinese New Year!
新年快樂!


Sunday, January 13, 2019

Braised Bitter Melon with Black Bean and Garlic 豉蒜炒涼瓜


I would say this is a staple dish I constantly have in the fridge.  I usually cook a large portion, enough to last for the week's lunch and dinner.  It is a dish I can eat everyday.  Whenever I reheat this at work, the fragrance of the black bean sauce makes my colleagues' and my mouth water.  So last week, I made some for them to share.  The bitter melon lovers loved them, but the others, who didn't like bitter food, didn't like these melons unfortunately.

The seeds are edible so you do not need to remove them.  Actually after the stir-fry process, the seeds feel rather crunchy and taste really good.  Sometimes I find the seeds taste even better than the melons themselves.

The preserved black beans can be found in most Asian stores.  They need to be rinsed a few times to get rid of the extra salt or grit before use.

INGREDIENTS:
2 Chinese Bitter Melon
3 tablespoons Chinese Preserved Black Bean, rinsed
1 head of Garlic, peeled and crushed
2 tablespoons Chinese Cooking Wine
2 tablespoons Sugar
1/4 teaspoon Salt
3 tablespoons Vegetable Oil

DIRECTION:
1. Combine garlic and black beans on a cutting board. Chop them until fine.  Add the bean mixture and the oil in the pan; fry it over low heat until fragrant.  It is about 15 minutes.

2. Meanwhile, cut the melons lengthwise and then cut it into about 1 cm slices.  Leave out the seeds if prefered.

3. Turn up the heat to the highest.  Add the melons in the pan and fry until they are bright green; about 10 minutes.  Add cooking wine and allow it to evaporate.

4. Add about 1/3 cup water, sugar and salt. Cover the lid, cook the melons on medium for about 10 minutes and the sauce has thickened.  Best served with steamed rice.


Saturday, December 30, 2017

Steamed Sweet Milky Custard Egg (Instant Pot version) |鮮奶燉蛋 (壓力煲版)


First snow today!  It is only the second week of November.  It seems like the winter just suddenly arrived.  My son was so excited jumping up and down in the bed.

It was -10 outside and I just found out in this particularly cold morning that my son didn't have his winter garments.  I've been putting jackets, gloves, and hats on my son and he's been forgetting to bring those things home.  He didn't realize how important it was to take care of his things until he found himself with nothing extra to put on to keep him warm.

He was crying because his ears ached in the bitter cold while he waited for the school bus.  We then needed to bring him back home and find him a small old hat under the drawer to wear.  Eventually, he missed the school bus and he got to wear that toddler hat to go to school today.

What a bustling morning!  Sometimes I wonder if most of the parents share the similar experience.

Sweet milky custard egg is a common dessert in Hong Kong many people will choose to to make at home.  My husband and I adore the silky texture of the egg.  You can substitute milk for coconut milk, or use only egg white instead of whole eggs.  If you don't have an instant pot, you can steam it over medium-low heat for 20 minutes.


Steamed Sweet Milky Custard Egg (Instant Pot version)
鮮奶燉蛋 (壓力煲版)


INGREDIENTS:
2 Eggs, large
1 cup Milk, homogenized
4 tablespoons Sugar


DIRECTION:
1. In a bowl, combine eggs and sugar.


2. Whisk until it is well combined.


3. Add milk and whisk well.


4. Pour the milk mixture slowly in a heat-proof container through a tea infuser.  This step is to get rid off the egg membrane.


5. Cover the container with foil tightly.


6. In the instant pot.  Pour in 2 cups of water and place in a low rack.  Carefully put the container on top.


7. Close the venting knob.  Press the "Manual" button once, and then press "Pressure" to adjust the pressure to low.  Press the "-" or "+" button to set the time to 6 minutes.

8. When the cooking process is done, allow the pressure to release naturally until the floating valve goes down.  Remove the container from the instant pot right away.  Serve it immediately.


In Hong Kong, we serve this custard egg both cold or hot.  It depends on the individual's preference.

Thanks for stopping by.  I hope you enjoy this recipe.


Friday, November 17, 2017

Spinach Pig Liver Soup | 菠菜豬肝湯


Spinach Pig Liver Soup | 菠菜豬肝湯  

Ingredients:
250 gram Pig Liver, rinsed and patted dried
4 cups Spinach, rinsed
1.5 tablespoons Dried Wolf Berries, rinsed
60 gram Ginger, peeled, cut into chunk


Marinade:
1 tablespoon Ground Ginger
1 tablespoon Corn Starch
1/4 cup Rice Wine
1/2 tablespoon Salt


材料:
250 克   豬肝,洗淨,抹乾
4 杯   菠菜,洗淨
1.5 湯匙   杞子,洗淨
60 克薑粒


醃料:
1 湯匙   薑蓉
1 湯匙   粟粉
1/4 杯   米酒
1/2 湯匙   鹽


DIRECTION:

Thursday, November 16, 2017

Walnut Sweet Soup | 合桃糊


Walnut Sweet Soup | 合桃糊

Ingredients: (4 servings)
1.5 cups Walnuts
1/2 cup White Rice, short grain
5-8 cups Water
1 cup Brown Sugar


材料: (4 人份)
1.5 杯   合桃
1/2 杯   白米, 圓米
5-8 杯   水
1 杯   片糖


DIRECTION:

Friday, November 3, 2017

Coconut Chicken Soup | 椰子煲雞


Unlike many other kinds of chicken soup, this coconut chicken soup carries a light consistency and fruity flavour, which keeps your body warm and without a mouth of grease.  The bonus of this recipe is that, while the soup is simmering on the stove, the exotic coconut fragrance fills the whole kitchen and let you forget the bitter cold weather outside anymore.


Coconut Chicken Soup | 椰子煲雞  

Ingredients:
750 gram Chicken Thigh, boneless
400 gram Fresh Coconut (the brown and hair type)
7-10 Red Dates, pitted
15 gram  Dried Wolf Berries
5.5 cups Water


材料:
750 克   雞脾肉,無骨
400 克   新鮮椰子
7-10 粒   紅棗,去核
15 克   杞子乾
5.5 杯   水


DIRECTION:

Sweet Corn Pork with Rice | 粟米肉粒飯


This is a common dish available in almost all the local restaurants in Hong Kong.  The creamy texture and the simpleness in the dish attracts many people.  Whenever we came home late from work and didn't want to cook, this dish was a very secure choice.  


Sweet Corn Pork with Rice | 粟米肉粒飯

Ingredients:
300 gram Pork, cubed
1 cup Cream Style Corn
100 ml Water
2 Eggs


Marinate:
1 tablespoon Sugar
1 tablespoon Soy Sauce
1 tablespoon Corn Starch
1/2 teaspoon White Pepper
1/3 teaspoon Salt


DIRECTION:

Enoki Mushroom Beef Rolls | 金菇肥牛卷


Enoki mushroom beef rolls are always a popular flavour in Hong Kong.  You will find many Japanese or Taiwanese restaurants serve them and list them on their menus.  It is the crunchy and juicy enoki, plus the tender and savoury beef attract people.  You can serve the rolls with cold beer as snacks or appetizer, or serve them with a bowl of white rice as a side dish.

Enoki Mushroom Beef Rolls | 金菇肥牛卷

Ingredients:
600 gram Enoki
600 gram Fatty Beef
Barbecue Sauce


材料:
600 克   金茹
600 克   肥牛
燒汁


DIRECTION:


Thursday, November 2, 2017

Stir fried Pineapple Beef | 菠蘿炒牛肉


Whether you are an adult or a kid you will love this dish.  My son ate almost all the pineapples and my husband wanted to swallow down the plate if he could.  I remembered my brother and I often fought over the last piece of beef and made sure we cleaned off the sauce on the bottom with our rice.  It is a very memorable dish for me.

You can use fresh pineapple here.  If so, cut off the hard skin and the needles, core the middle part, and then soak the pineapple in salted water for twenty minutes before use.  That can lessen the irritating enzyme in pineapple to your mouth and skin.


Stir fried Pineapple Beef | 菠蘿炒牛肉

Ingredients:
450 gram Angus Beef, sliced
1 Canned Pineapple, drained
1 tablespoon Oyster Sauce
2 tablespoons Vegetable Oil


Marinade:
2 tablespoons Soy Sauce
2 tablespoons Vegetable Oil
1 tablespoon Sugar
1/4 cup Rice Wine
1 tablespoon Corn Starch
1/4 teaspoon Ground White Pepper


材料:
450 克   安格斯牛肉
1罐   菠蘿粒,濾去糖水
1 湯匙   蠔油
2 湯匙   菜油


醃料:
2 湯匙   豉油
2湯匙   菜油
1 湯匙   糖
1/4 杯   米酒
1 湯匙   粟粉
1/4 茶匙   白胡椒粉


DIRECTION:

Simple Sesame Sweet Soup | 簡易芝麻糊


Adding white rice in the sweet soup is to thicken the consistency and also gives it a smoother texture while coordinating the bitter flavour of the sesame.  You may see that I added a few other types of mixed grains in my rice, but it's totally personal preference.  The fact was, I ran out of white rice.  Lol. 

In this recipe, I skipped the process of straining, which is supposed to give a silky texture for your palate.  Since this original texture doesn't bother me, I was happy to keep all the remains and to save the work.  If you do like the smoother version, after blending the rice and the sesame, you can strain the mixture through a cheese cloth or a fine-mesh sieve to filter the residue.

Hope you enjoy our traditional dessert.


DIRECTION:


Simple Sesame Sweet Soup | 簡易芝麻糊


Ingredients: (yield about 2 portions)
85 gram Ground Black Sesame
20 gram Rice, rinsed, soaked for about an hour
60 gram Rock Sugar or White Sugar
2 cups Water

* Ground black sesame is always available in big Asian markets.  If you have only black sesame seeds, just simply toast them in a pan over a low heat until they are fragrant and start to pop.  Then, blend the seeds with the soaked rice together until smooth.


材料: (約2人份)
85 克   黑芝麻粉
20 克   白米,洗淨,浸約一小時
60 克   冰糖 或 白砂糖
2 杯   水

*黑芝麻粉通常在大型華人超市找到。如真的只有完粒黑芝麻,你可用慢火把其炒香,再與浸好的白米一起磨成粉未。


Kelp and Mung Bean Sweet Soup | 海帶綠豆沙


Another popular summer dessert that is well known in Hong Kong.  We like to eat it warm or cold, and even make popsicle out of it.  The ingredients should be available in many Asian markets.  I hope you will give this recipe a try this summer.

Kelp and Mung Bean Sweet Soup
海帶綠豆沙

Ingredients: (yield about 6 servings)
1 cup Green Bean
7 cups Water
10 gram Dried Tangerine Peel
25 gram Dried Kelp
100 gram Rock Sugar


材料:(約6人份)
1 杯   綠豆
7 杯   水
10 克   陳皮
25 克   乾海帶
100 克   冰糖


DIRECTION:

Wednesday, November 1, 2017

Winter Melon Kelp Soup | 冬瓜海帶湯


Winter Melon Kelp Soup | 冬瓜海帶湯  

Ingredients: (4-6 servings)
1 kg Winter Melon, peeled and seeded
15 Dried Shitake Mushrooms (Dried Chinese Mushrooms)
300 gram Ribs
1 large piece of Kelp
6 cups Water + 2 cups Water
10 gram Ginger Slices
Salt to taste


材料:
1 公斤   冬瓜,去皮和核
15 隻   乾冬菇
300 克   豬筋骨
1 塊   海帶
6 杯   水 + 2 杯   水
10 克薑片
調味   鹽


DIRECTION:


Friday, July 14, 2017

Mango Coconut Sago | 芒果椰汁西米露


Having grown up in Hong Kong, I was lucky enough to be exposed to many different cuisines locally and while travelling within Asia to search for food.  Food is a big part of our life!  Hong Kong people love Japanese, Taiwanese, Thai, Indian, Indonesian, Korean, Singaporean, Filipino food...the list is pretty long.  We don't mind to pack a lunch for work everyday to save money for a "food trip" to nearby countries.

We enjoy exotic food and always look for something new to try; the more exotic the food, the more we crave for it.  The ingredients don't necessarily have to be expensive or rare.  In fact, most Hong Kong people love cheap or reasonable snacks or meals, like pickled chicken feet, marinated chicken wing tips, and seared pig livers on noodles.  

Other than eating out, many people also enjoy cooking at home for their family and friends.  It is common to see school girls or office ladies bring their newly successful homemade dessert or snacks to share with their best friends, lovers, or colleagues.  I know a few friends of mine who fell in love with their wives because of their warm, skillful, and generous cooking.  Cooking is generally considered a virtue although it's been becoming less important as generations pass.

Mango coconut sago is a Filipino dessert with a twist of Hong Kong flavour.  I don't know many people who don't enjoy eating this summer dessert.  The sweet yet tangy mango chunks go perfectly with the rich and creamy coconut milk, along with the slightly chewy sago.


Left side - tinted sago

Sago is a starchy product that is extracted from the stem of the sago palm tree.  It is different than tapioca which comes from cassava starch.  Sago is tasteless and odourless.  You can find commercially whitened sago or tinted sago widely available in most Asian supermarkets.

In Hong Kong, I always mixed coconut cream and water for this dessert.  Since I couldn't find coconut cream here, I used coconut milk instead.  AROY-D coconut milk is the brand I recommend; it is relatively good quality for its price.

Thanks for stopping by.  I hope you enjoy this recipe.


Mango Coconut Sago
芒果椰汁西米露


Ingredients: yields 4 portions
2 Mangoes, ripe
1/2 cup Sago
6 cups of Water
1/2 cup Rock Sugar
1 can Coconut Milk, large


How to make it:
1. Bring the 6 cups of water to a boil over high heat.  Once boiling, pour in the sago.  Let the water come back to a boil and then reduce the heat to medium-low.  With the lid on, continuously boil the Sago until it is translucent, about 15 minutes.  Remove the pot from the heat and leave it for 10 minutes.  (Read the Reminder 1).

2. Drain the cooked sago and cool it down immediately under runny water.  Gently rinse them until most of the starch is gone.  Transfer it to a big bowl; set aside.


3. In a pot, add the coconut milk and rock sugar.  Gently heat it up over medium heat until the rock sugar is dissolved.  There is no need to totally boil the coconut milk.  Remove the mixture from the heat.  Once it has cooled to touchable temperature, transfer it to a blender.  Set it aside.  (Read the reminder 2).

4. Peel off the mango skins, Cut both sides of flesh from each mango pit and save them to make mango cubes.  Scrape off the leftover flesh around the pits to the coconut milk, and then process it in the blender until smooth.  Pour the coconut mixture into the sago. 

5. To make mango cubes, score the mangoes without cutting through their skins.  Scoop out the flesh with a spoon.

6. When the sago mixture is no longer warm, gently mix in the mango.  Transfer the dessert to the fridge until chilled.  Enjoy it within three days.


Reminder:
*1. The sago is considered done even there is tiny white dots in the centre.  Through further cooking process, the dots should be gone.  Overcooking the sago will result in a gluey mess.  Also, a lack of water causes scorching on the bottom and creates a gluey mess. Adjust the amount of the water as needed.

*2. If you don't want to use too much coconut milk, cut the amount in half and replace the rest with water.


Roasted Butternut Squash Soup | 烤葫蘆南瓜湯

Compare to the non-roasted version, roasted butternut squash instead brings a tremendous different in the flavour.  The caramelized s...