Showing posts with label bread / cakes. Show all posts

Monday, January 7, 2019

The Fluffiest Vegan Pancake


Vegan pancakes don't have to be tasteless and hard.  These pancakes are super fluffy, and even fluffier than the non-vegan ones.  The key is in the small amount of vinegar and Flaxseed "egg whites".  Try to make your own version by playing around with the seasoning.  Enjoy!


INGREDIENTS
1 cup Whole Wheat Flour
1 cup All Purpose Flour
1.5 tablespoon Baking Powder
1.5 cups Almond Milk
1/4 cup Coconut Nut Oil (Odourless), melted
4 tablespoons Flaxseed "Egg White" (1 tablespoon Flaxseed + 4 tablespoons Hot Water)
1 tablespoon Vanilla Extract
1/2 teaspoon Apple Cider (or White Vinegar)
1/3 cup Raisin (optional)
1/3 teaspoon Salt
Maple Syrup (to serve)

DIRECTION:
1. Mix 1 tablespoon Flaxseed and 4 tablespoons Hot Water together to create "Egg whites"; set aside.

2. In a large bowl, whisk all wet ingredients together.  Add all dry ingredients into the wet mixture; mix it to combine as batter.  Leave it for about 10 minutes before use.


3. Heat up a non-stick skillet over medium heat.  Add a large spoonful of batter.  Patiently wait until the surface of the batter starts to bubble and slightly firm up.  Flip the pancake over and cook for another 2 minutes.  Turn down the heat if the pancakes brown too fast.


4. Repeat this process until all the batter is finished.  Serve them with maple syrup.


Friday, November 30, 2018

Strawberry Poppy Waffle


The waffle machine is my new addition in the kitchen and I love it.  I like that it doesn't require so much attention like pancakes and no more flipping.  All I need to do is to add the batter in the centre, close the lid and allow it to cook until the light comes on to tell me it is ready.  Every Saturday I will make a large batch of waffles that is enough to last for the week.  This week, we added some freshly mashed strawberries and they were delicious!  My husband said he couldn't believe how strong of a strawberry flavour that little piece of waffle could contain.  To serve, we always use maple syrup, but feel free to use other substitute.


INGREDIENTS:
6 Strawberries, mashed
2 Eggs, beaten
1/3 cup Butter, melted
2 tablespoon Vanilla Extract
1/3 cup Milk
2 cups Whole Wheat Flour
1 cup Pastry Flour
1 tablespoon Poppy Seeds
small pinch of salt

DIRECTION:
1. In a large mixing bowl, whisk together butter, eggs, vanilla extract, milk, and mashed strawberries until they are incorporated.

2.  Add the rest of the ingredients; mix well.  The batter should be very thick and gluey.

3. Heat up the waffle machine to medium heat.  Add two big spoonfuls of batter in the centre, and cook according to the machine indication.  Serve with maple syrup.


Apple Waffles


In the previous post I mentioned that I make waffles every weekend for the upcoming week as breakfast.  And this week, I used the apples that we freshly picked from the orchard yesterday.  They were delicious!

INGREDIENTS:
1 Apple, peeled, cored and finely chopped
3 Large Eggs, beaten
1/3 cup Butter, melted
1/4 cup Sunflower Seed Oil
1 cup Milk, 2%
3 tablespoons Vanilla Extract
1 cup Pastry Flour
2 cups Whole Wheat Flour
2 tablespoons Cinnamon Powder
1 teaspoon Pumpkin Spice Powder
handful of Flaxseed (optional)
1/3 teaspoon Salt

DIRECTION:
1. In a large mixing bowl, whisk eggs, butter, vanilla extract, milk, and the oils together.

2. Add all the rest of the ingredients.  Mix until they are totally incorporated.  The batter should be very thick and sticky.

3. Heat up the waffle machine to medium heat.  Add two spoonfuls of batter in the centre and cook until it is done according to the machine indication.  Serve with maple syrup or chutney.


Sunday, October 21, 2018

Mashed Avocado Egg Sandwich


The avocado replaces the mayonnaise in this mashed avocado egg sandwich, making it a more healthy meal while it still tastes pillowy and smooth.


INGREDIENTS:
2 Eggs
1 ripe Avocado, pitted
1 tablespoon Mayonnaise
1/2 teaspoon Apple Cider Vinegar
Salt and Pepper to taste
Sandwich Bread (for serving)

DIRECTION:
1. Place the eggs in a pot of cold water.  Bring it to a boil over high heat for about 10 minutes; drain.   Fill the pot with cold water and allow the eggs to sit for about 1 minute before peeling them.

2. In a bowl, add the eggs and pitted avocado.  Mash them together with a masher or a folk until they are well incorporated.  Add the rest of the ingredients; mix well.  Serve with sandwich bread.


Friday, August 24, 2018

Zucchini Chocolate Bread | 義大利青瓜巧克力麵包


In Summer, we always try to include zucchini in the menu since it is abundant and inexpensive.  Most of the the time we put zucchini in salad, eating it raw like cucumber with balsamic vinaigrette.  But we also enjoy sautéing it with lots of garlic as a warm salad.

This week, I tried something new, using zucchini to make this quick bread for our breakfast.  It turned out very moist and filled with cocoa aroma.  Although you will not taste any zucchini in the bread, you will still see strings of zucchini in the bread that makes you feel good about including vegetable in your breakfast.
  

INGREDIENTS:
1 Zucchini, shredded (about 2 cups)
4 Eggs, beaten
1/2 cup Milk, 2%
2 tablespoons Vanilla Extract
2 cups Whole Wheat Flour
1 cup Bread Flour
1 cup Brown Sugar
2 tablespoons Baking Powder
1 handful of Semi-Sweet Chocolate Chips
2 tablespoons Poppy Seeds (optional)
pinch of Salt

材料:
1 條  義大利青瓜,刨絲 (約兩杯)
4 隻  雞蛋,打勻
1/2 杯  牛奶,2%
2 湯匙  雲呢拿香油
2 杯  全麵麵粉
1 杯  高筋麵粉
1 杯  棕糖
2 湯匙  泡打粉
少量  牛奶巧克力粒
2 湯匙  罌粟籽 (可省略)
少撮  鹽


DIRECTION 做法:

1. Pre-heat oven to 360C.

2. In a mixing bowl, whisk together eggs, brown sugar, vanilla extract, and milk.  Add shredded zucchini; mix again.

3. Sift in whole wheat flour, bread flour, baking powder, and salt.  Add poppy seeds.  Mix until the mixture becomes batter and it is well incorporated.

4. Lay parchment paper in a baking container.  Pour in the batter and slightly drop the container on the counter a few times to get rid of the air bubbles.  Sprinkle the chocolate chips.  Bake it in the oven for about 30 minutes.

To check the doneness, insert a toothpick in the middle of the bread.  If it comes out clean, the bread is ready.  Allow the bread to cool before slicing it.

1. 預熱焗爐至360F。

2. 在一只碗內,加入雞蛋、棕糖、雲呢拿香油、和牛奶;攪打至均勻。下義大利青瓜絲;拌勻。

3. 全麵粉、高筋粉、泡打粉、和鹽。下罌粟籽;拌勻至變成麵糊。

4. 焗模內舖上焗紙,把麵糊倒入。把焗模在臺面上敲打數下以去取麵糊內的氣泡。灑上巧克力粒。放入焗爐,焗若30分鐘。

要測試麵包焗好與否,可把一支牙簽插入麵包中間再取出,如沒麵漿黏著便是焗好。


Thursday, July 12, 2018

June Berry Muffins with Lemon and Cardamom


June berries are also called service berries.  We are so lucky to have many of them grow at the park across the street.  When it comes to mid-June, the berries will become purplish-red and attract many birds to eat them.


My son is familiar with these little tiny juicy berries and he knows exactly which trees in the park produce the best berries.  He often suggests to pick some berries on the way home to add into pancakes or muffins, but he usually ends up snacking on them instead of bringing them home.  Now, eating June berries is a highlight for my son in the summer after he plays at the splash pad at the park.


Actually June berries are a very common botanical plant in Toronto.  If you pay attention, you will certainly come across them in parks, gardens, or sidewalks.

I froze the June berries before I used them for the recipe here.  It is only because I didn't have time to make the muffins for that few days and I didn't want them to go bad.  However, fresh berries are equally good.


INGREDIENTS:
1 cup June Berries, frozen
1 cup Cornmeal
2 cups All Purpose Flour
2 teaspoons Baking Powder
1/2 cup Brown Sugar
1 handful of Quinoa (optional)
3 Eggs, beaten
1/2 cup Butter, melted
1 cup Milk, 2%
1 Lemon, zest and juice
2 teaspoons Cardamom, ground
1 teaspoon Ground Ginger
pinch of Salt

材料:
1 杯  Juneberries,冷凍
1 杯  玉米粉
2 杯  麵粉
2 茶匙  泡打粉
1/2 杯  棕糖
一把  藜麥 (隨意)
3 隻  雞蛋,打勻
1/2 杯  牛油,熱溶
1 個  檸檬,皮和汁
2 茶匙   豆蔻粉
1 茶匙  薑粉
少撮  鹽


DIRECTION:
1. Preheat the oven at 360F.

2. In a large bowl,combine butter, eggs, milk, lemon juice and zest together; mix well.

3. Add in cornmeal, flour, quinoa, cardamom, ground ginger, brown sugar, baking powder, and salt.  Mix everything thoroughly into batter.

4. Gently stir in the frozen June berries.  Divide the batter equally into the paper muffin cups.  Bake for about 20 minutes.

做法:
1. 預熱焗爐至360F。

2. 在一只大碗內,加入牛油、蛋、檸檬汁和皮;拌勻。

3. 下玉米粉、麵粉、藜麥、薑粉、棕糖、泡打粉,鹽;拌勻成麵糊。

4. 輕輕拌入Juneberries。把麵糊平均倒入小蛋糕模。焗若20分鐘。


Wednesday, July 4, 2018

Basil Baked Polenta | 香焗九層塔玉米糕


Polenta is made of cornmeal and is in porridge form when cooked.  Once it cools, it will solidify and it can be used for frying, grilling and baking.

If you want a change from roasted potato for a side dish, a light baked polenta is a good choice. My family likes polenta that is baked until very crispy outside and still soft inside.  Sometimes we serve it with a dash of sweet paprika, and sometimes we eat them with ketchup as if you are eating French fries.  Today, I bought a big bunch of fresh basil at the Farmers' market. So I decided to use it to flavour the polenta.

Thanks for stopping by. I hope you enjoy this recipe.


INGREDIENTS:
1 tube Polenta (I used Aurora Polenta)
1/2 cup Basil, Fresh
1/4 cup Vegetable Oil
Salt to taste

材料:
1 條  玉米糕
1/2 杯  九層塔,新鮮
1/4 杯  菜油
鹽  調味

DIRECTION 做法:
1. Roughly chop the basil leaves; add them into the vegetable oil. Add salt; mix well.

1. 九層塔切碎,加入菜油和鹽;拌勻。


2. Cut the polenta into 2 cm rounds.

2. 玉米糕切成2厘米厚塊


3. Coat the polenta with the basil oil mixture.  Line them on parchment paper without over lapping them.

3. 把每塊玉米糕沾上九層塔油,把其排在已舖好焗紙的盤上。


4. Bake at 400F for about 25 minutes, or until the outer layers are crispy.

4. 用400F焗若25分鐘,或至外層香脆。


Tuesday, June 26, 2018

How to make simple crepe


Crepes are something that look very elegant on the plate and always gives an impression to people that it's difficult to make.  In fact, making crepes are as easy as making pancakes.

There are so many different recipes out there which claim to make the softest and best crepes.  I will not say mine is one of those, but my crepes are soft and delicate, and still retain the softness after keeping them in fridge for a few days.

The ratio to make my style of crepe is 1:2:1 for 1 cup of flour: 2 cups of milk: 1 egg.  The melted butter is for greasing, so don't need to measure it too carefully.

Thanks for stopping by.  I hope you will try this recipe.


Simple Crepe Recipe

INGREDIENTS:
1 cup Flour
2 cups Whole Milk
1 Egg
4 tablespoons Butter, melted
1 teaspoon Vinilla Extract (optional)
a pinch of fine sea salt (optional)


DIRECTION:
1. In a bowl, whisk the egg.  Add the milk, butter, and vanilla extract and whisk again until it is well combined.

2. Add flour and salt.  Gently mix until it becomes a thin batter.  The batter should resemble to the texture of melted ice cream.


3. Heat up a small non-stick pan over medium heat.  Add a small ladle of batter in the pan while swirling the pan.  Continuously swirl the pan until the whole surface is covered. 

If you don't swirl the pan, most of the batter likely will just sit in the middle and the crepe ends up becoming uneven, with thin edges but thick centre.

4. Wait for about 1 minute and then shake the pan.  If the crepe is loose it means that it's ready to be flipped over. 


The freshly made crepe
5. Toss the pan to quickly flip the crepe over and then cook the other side for another 30-45 seconds. 


6. Transfer the crepe to a plate and loosely cover it with plastic wrap.  Repeat this process until finishing the batter.


You can make strawberry crepe by adding whip cream, halved strawberries, and icing sugar.  Or, you can add sliced banana and Nutella.

Sometimes I serve it with ham and cheese for brunch.  This crepe is wonderful to pair with both sweet and salty.  I hope you will enjoy it.


My son was excited to have crepe for breakfast, especially with the fresh strawberry he picked the day before. 


Rilakkuma Banana Pancake | 鬆弛熊香蕉熱香餅


Do you have any overly ripe bananas sitting on the countertop? If so, you can turn them into banana pancakes.  My son loves banana pancakes, so we always purposely buy extra bananas and wait for them to be "spotty".

Two bananas are sufficient enough to make a stack of pancakes of ten.  If you want to give your bear a little more "honey skin tone", you can add a little sugar in the batter.


Rilakkuma Banana Pancake
鬆弛熊香蕉熱香餅  
INGREGIENTS:
1 1/4 cups Plain Flour
2 Eggs
1 Banana, soft or ripen
1 cup Milk
1/3 cup Butter, melted

DECORATION:
1 Banana
Chocolate Chips
Strawberries (optional)


材料:
1 1/4 杯   麵粉
2 隻   雞蛋
1 條   香蕉,半熟或熟透
1 杯   牛奶
1/3 杯   溶牛油

裝飾:
1 條   香蕉
巧克力粒
草莓 (隨意)


DIRECTION:

Thursday, June 14, 2018

Basic Whole Wheat Waffle | 基本全麥窩夫做法


Having planned to buy a waffle machine for a while, I finally found one on sale on Amazon, although it wasn't the Belgian waffle style I originally looked for.  It was okay.  The waffles still made my husband and my son so happy.

The waffle batter is very similar to the pancake one, but the waffle batter doesn't have milk and is slightly thicker.  Since I don't need to stand at the stove and wait to flip them, I would say making waffles are much less work than making pancakes.


It was a very nice day with blue sky and breezes.  We'd planned to go on a hike on the bruce trail near Milton.  But my son was throwing a big fit for a long time just because he did not want to brush his teeth.  After things settled, it was already too late to go.  He was so upset.

Luckily the next day also had fine weather, so we decided to go to the park nearby to fly a kite.  My son was beyond excited (because before I told him the consequence for his fit yesterday was staying home).  He didn't expect he could fly a kite.  But he apologized and behaved very well afterward.  He got changed at his highest speed and grabbed bubbles and a football to go with him.

I never knew that my husband was really good at flying a kite.  It seems that when he threw the kite, it automatically climbed up to the sky.  My son laughed loudly in excitement.  He kept running left to right along the wind as my husband told, and let the string go loose.  The kite became a small dot in the blue sky.  I was watching them while resting on a bench.  It was nice to just sit and enjoy the sun. It was all I needed after the whole week of hard work.


Yesterday I spent lots of time finally cleaning up our garden. I planted radishes, carrots, and potatoes and my husband helped me set up the nice flower planter.  My son picked this yellow cactus to add to our garden; he said yellow is his favourite colour and cactus is one of his favourite plant.  My son always has so many favourites of something.  But the cactus indeed looked special so I also got a pink one for my mother in-law as a belated Mother's Day gift.

Thanks for stopping by. I hope you enjoy this little story and the waffle recipe.


INGREDIENTS:
2 cups Whole Wheat Flour
2 teaspoons Baking Powder
pinch of Sea Salt
2 tablespoons Vanilla Extract
2 Eggs
1/3 cup Butter, melted

DIRECTION:
1. In a bowl, combine flour, baking powder, and salt; set aside.

2. In a separate bowl, beat together the rest of the ingredients.  Then, add in the flour mixture; mix well until it becomes smooth batter.

3. Preheat the waffle machine and set it to medium-high heat.  Add two spoonfuls of batter and cook until it is well set and slightly crispy.  Serve it with maple syrup.


Friday, June 8, 2018

Basic Cornbread | 玉米麵包


Cornmeal is made of a type of corn called dent corn. Unlike the sweet corn we usually use for salad or barbecue, dent corn has little sweetness and contains higher starch. After drying and various grinding processes, dent corn becomes cornmeal that is fine to coarse in consistency, depending on the range of grinding. Cornmeal is widely used for making cornbread, polenta, or tortilla, and it comes in yellow or white colours.

Actually, cornbread originated with Native Americans. Before the European settlers set foot on America, the Natives had already had a long history of using the dried cornmeal to make cornbread as their staple.  But the original recipe is very basic, combining just cornmeal and water, or sometimes lard.  So the taste was rather bland. Later the Europeans adopted the recipe and added milk and butter to make it more flavourful.

We should really thank the Native Americans.


INGREDIENTS:
1/4 cup Butter
1 cup Milk
2 Eggs, large
1.25 cups Yellow Cornmeal
1 cup All Purpose Flour
1/2 cup Sugar
2 tablespoons Baking Powder
pinch of Sea Salt

做法:
1/4 杯  牛油
1 杯  牛奶
2 隻  雞蛋,大
1.25 杯  黃玉米粉
1 杯  多用途麵粉
1/2 杯  糖
2 湯匙  泡打粉
小撮  海鹽


DIRECTION:
1. Preheat the oven to 350F.  Melt butter in microwave; let it cool.

2. In a large bowl, whisk two eggs.  Add melted butter and milk; whisk again until it is combined.

3.  Add all the remaining ingredients.  Gently mix until it is incorporated.

4. Line a baking tray with parchment paper.  Pour the mixture into the tray and smooth the surface with the back of a spoon.

5. Bake it for about 15-20 minutes, or until the corn bread rises up and is firm.  Let it cool completely on a rack before slicing them.

做法:
1. 預熱焗爐至350F 。 用微波爐熱溶牛油;放涼。

2. 在大碗內打勻兩隻雞蛋。下牛油和牛奶;攪打至均勻。

3. 加入剩餘材料;拌勻成麵糊。

4. 焗盤上舖上焗紙,倒入麵糊,用匙背舖平。

5. 焗15-20分鐘。取出,置架放涼。

Sunday, May 6, 2018

Buttery Rosemary Bannock | 迷迭香無酵母班諾克麵包


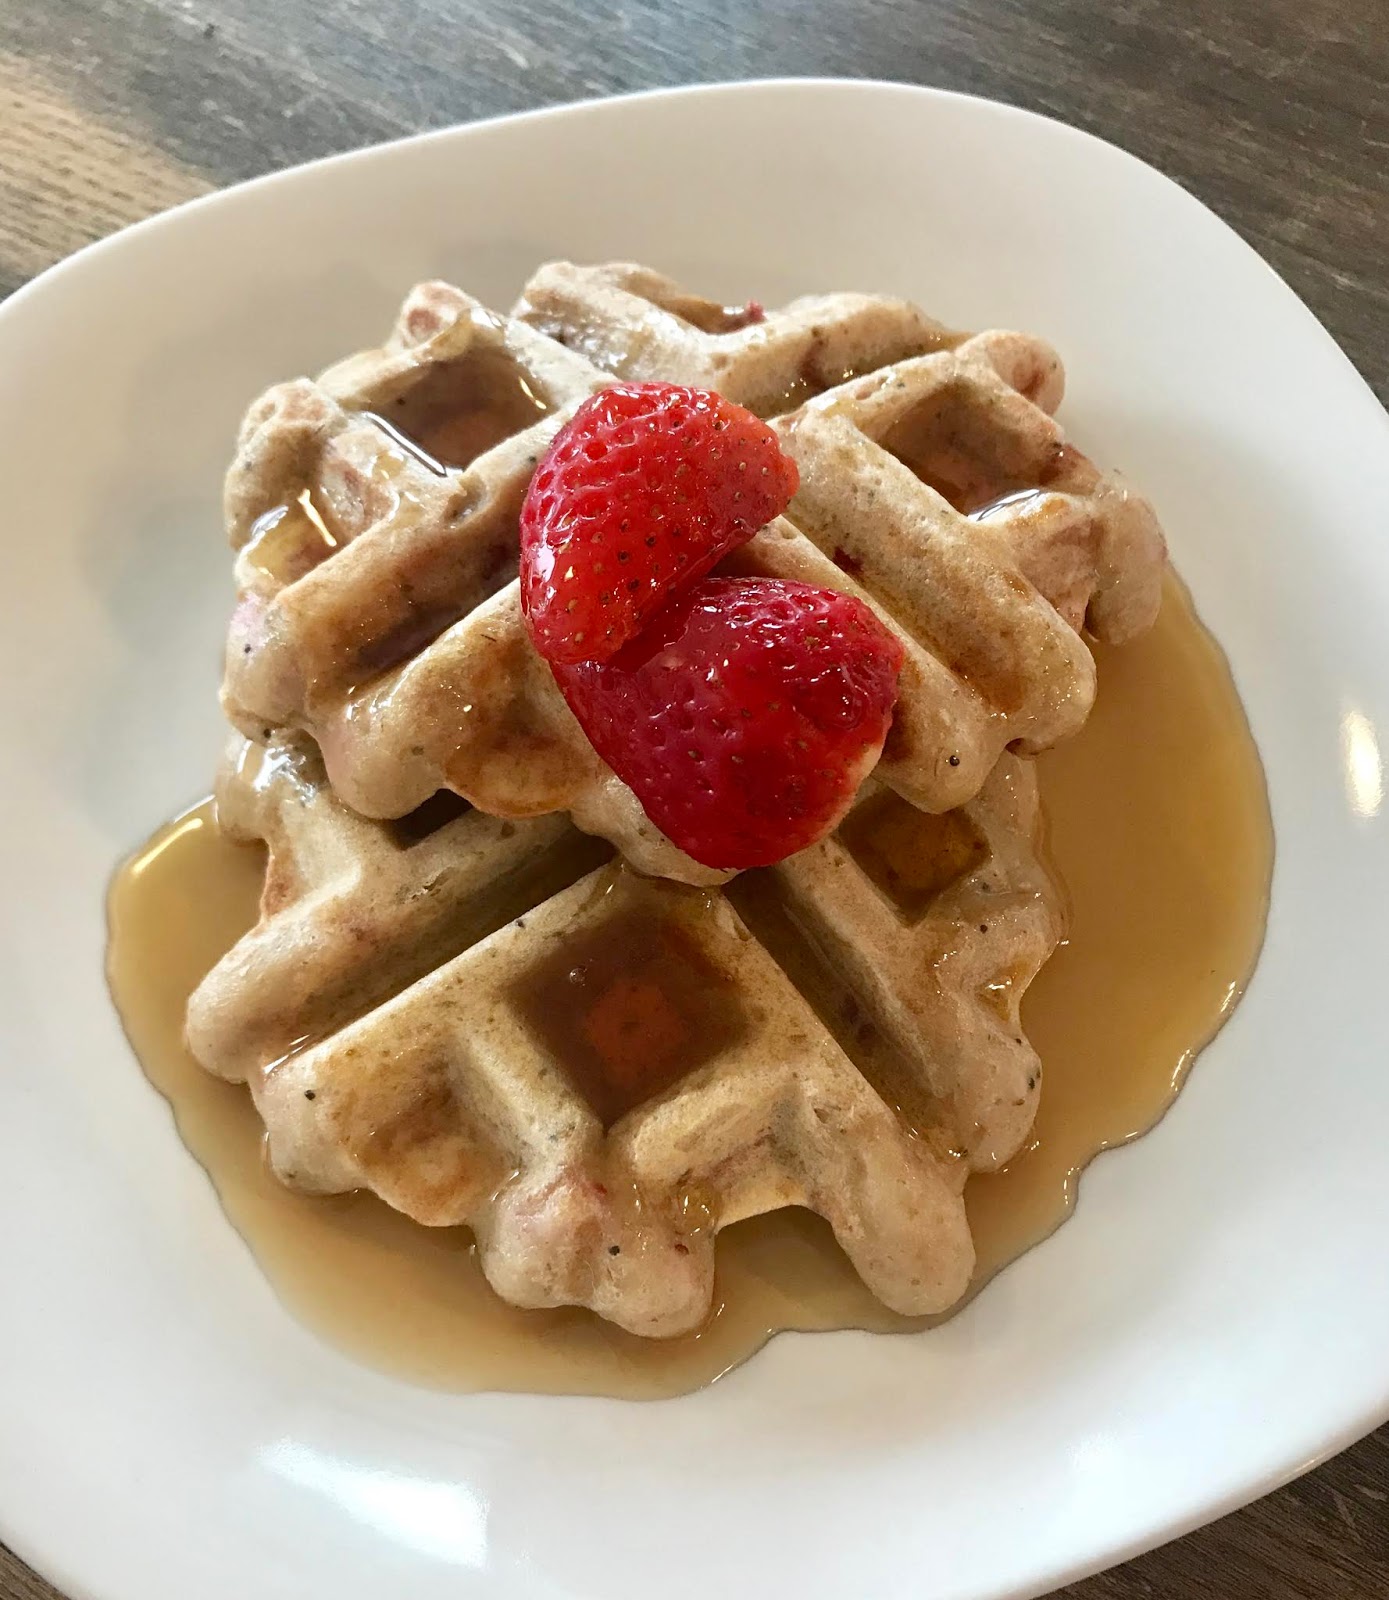
Bannock is the staple food for Aboriginal people in Canada.  It is a form of unleavened bread that has a firmer texture.  Traditionally, bannock is made of lard, wheat flour, and water, but I replaced the lard for butter in this recipe since butter is more obtainable and healthier.

In this recipe, I will show you how to cook bannock in a kitchen with a non-stick pan.  In fact, you can apply this exact recipe to outdoor cooking and cook the bannock on a rock over an open fire. 

My husband and I enjoy cooking bannock when we go hiking.  It is the food that can be easily prepared ahead of time and pull it out to cook at the site.  All you need is to place the dough onto a rock (I assume you will set up a fire).  After the long hike, a hot meal composed of some nicely roasted bannock and hot soup is just so satisfying.  One time, we even got lucky enough to find some juniper berries growing right beside the fire, and we added it into our bannock dough.  The taste was remarkable.

  I hope you will enjoy this recipe.


Buttery Rosemary Bannock
班諾克無酵母麵包 

INGREDIENTS:
Rosemary Infused Brown Butter (recipe on the bottom; it takes only 15 minutes to make)
Bread Flour
Water
Salt

材料:
迷迭香牛油 (食譜在最下面;約時15分鐘)
高筋麵粉


METHODS:
1. In a large bowl, combine all the ingredients.  Mix it to combine and roll it into a dough.  The dough should be slightly sticky but can be handled without sticking to your hand.  Add more flour if needed.

2. Heat up a non-stick pan over medium heat.  At the same time, pull out a piece of dough and roll it into a flat circle shape.  Place the dough in the pan carefully.  Fry both sides of the dough until slightly brown; about 4-5 minutes each side.  Transfer to a serving plate.

做法:
1. 在一只大碗中加入所有材料,拌勻揉成麵糰。麵糰應稍黏黏,但不需要用手粉。如麵糰太濕,加少許麵粉調節。

2. 用中火預熱易潔鍋;同時間取一小入麵糰搓成圓餅狀。把其小心放到預熱了的平底鍋中,烤至兩邊微金黃;每邊若4-5分鐘。

Rosemary Brown Butter 迷迭香焦化牛油

Brown butter is actually an intensified aromatic butter after a browning process.  Through melting, the water in the butter evaporates out and leaves the butter fat and milk solids behind.  It has a sweet and complex mix of nutty flavour that can be used in cooking and baking.  

There are three types of brown butter: golden brown, brown-brown, and nearly black.  The longer the browning time, the deeper the flavour and the darker the colour the butter will become.

The rosemary brown butter in this recipe belongs to golden brown. Increase the cooking time if more intense flavour is desired.

焦化牛油其實是以溶化的過程提高天然奶香和焦香的牛油。熱力把牛油內的水入蒸發掉,剩下全脂肪和凝固成顆粒狀的奶脂。

焦化牛油有三種:微金黃、啡色,和深啡。牛油越煮得久,味道越濃和色澤越變深色。

這個迷迭香焦化牛油是微金黃色;如想更濃口味,可增加烹煮時間。

INGREDIENTS:
1 tube Butter, unsalted
2 sprigs Rosemary

材料:
1 條 牛油,無鹽
2 束  迷迭香

METHODS:
1. In a sauce pan, add the butter and rosemary.  Melt the butter over medium-low heat.  It is normal if there is lots of foam at the beginning.  Reduce the heat if the butter bubbles too much.

2. When the bubbles subside, the brown butter basically is ready.  Remove the rosemary.  Then, pay attention to the butter.  You can choose to continue the browning until the butter reaches the desired colour and flavour.

Note that it can happen very quick, especially from "brown-brown" to "nearly black" stage. When the butter nearly reaches to the desired colour, remove it quickly from the heat and transfer the butter to another container.  The remaining heat in the butter will continue the browning process while cooling.

做法:
1. 在一小鍋內放入牛油和迷迭香,以中小火熱溶牛油。白色泡沫會開始形成。若牛油過熱,把火調底。

2. 當泡沫消失,焦化牛油基本上已完成。拿掉迷迭香。若想牛油更濃味,繼續烹煮牛油。

3. 要注意把牛油由"啡色"煮至"深啡"的過程很易焦掉。當牛油快變成理想顏色,迅速離火倒入另一器皿內。牛油內的高溫會繼續烹煮過程。


Friday, April 20, 2018

Honey Oatmeal Quick Bread | 蜂蜜燕麥無酵母麵包


I often make a big batch of pancakes, muffins, or granola for our breakfast that is enough to last for the whole week.  Since I was so busy, I didn't continue this practice for quite awhile.  My son began to complain about it.  Well, he sounds a little spoiled here, but I am glad at the same time that he likes my cooking so much.

Usually my son doesn't pay much attention on what flavour of quick bread I make because I just bake often enough that he has the rotation.  But this time, after months of just munching on the store-bought cheerios, he said he had something to say.  "I want cinnamon and pumpkin," he suggested.  We negotiated and talked about the flavour of four seasons, and finally we both settled on the honey and cinnamon flavour for spring.

It is only a little piece of our funny story.  I hope you enjoy the recipe.


Honey Oatmeal Quick Bread
蜂蜜燕麥無酵母麵包

WET  INGREDIENTS:
3 Eggs, large, beaten
1/3 cup Milk
1/4 cup Butter, melted
1/4 cup Vegetable Oil
1/2 cup Raw Honey

DRY  INGREDIENTS:
2.75 cups Whole Wheat Flour
1 tablespoon Cinnamon, ground
1.5 tablespoons Baking Powder
pinch of Salt

濕材料:
3 隻  大雞蛋,打勻
1/3 杯  牛奶
1/4 杯  牛油,熱溶
1/4 杯  菜油
1/2 杯  蜂蜜

乾材料:
2.75 杯  全麥麵粉
1 湯匙  肉桂粉
1.5 湯匙  泡發粉
少撮  鹽


METHODS:
1. Preheat the oven to 360F.

2. In a large mixing bowl, add all the wet ingredients; mix well.

3. Add the dry ingredients. With a spatula, gently mix until it is totally incorporated and becomes a sticky batter.

4. Pour the batter in a baking tray that is lined with parchment paper.  Transfer it to the oven.  Bake it for about 30-40 minutes, depending on the thickness of the batter.

5. To test the doneness insert a toothpick into the bread.  It is ready if the toothpick comes out not sticky.  Allow the quick bread to totally cool before slicing it to prevent it from breaking apart.

做法
1. 預熱焗爐至360F。

2. 在一只大碗內,加入所有濕材料;拌勻。

3. 倒入所有乾材料;拌勻至濃稠麵糊。

4. 焗盤舖上焗熱;倒上麵糊。 放入焗爐;焗約30-40 分鐘,在乎麵糊厚度而定。

5. 要看麵包焗好沒有,把一支牙簽插入麵包。如取出牙簽沒有麵糊黏任做成。把麵包完全放涼後才切件,避免散開。


Roasted Butternut Squash Soup | 烤葫蘆南瓜湯

Compare to the non-roasted version, roasted butternut squash instead brings a tremendous different in the flavour.  The caramelized s...