Showing posts with label dessert. Show all posts

Wednesday, April 22, 2020

Apple Crumble


During the pandemic, my son gets a lot of free time after his homework. I've tried to keep him busy with different activity. This morning, we decided to make an apple crumble for breakfast. "Don't tell Daddy. We are going to make this for breakfast to surprise him," my eight-year-old son whispers to me. We both woke up super early and creeped into the kitchen, starting to make the crumble. The cinnamon scent filled the air and it warmed our hearts in the very cold morning. Hope you enjoy this recipe.


INGREDIENTS FOR APPLE FILLING:
2 Apples
5 tablespoons Brown Sugar
1 teaspoon Ground Cinnamon
2 teaspoons Vanilla Extract
1/4 cup Water
1/8 teaspoon Salt

INGREDIENTS FOR TOPPING:
3/4 cup All Purpose Flour
1/4 cup Cold Butter, cubed

DIRECTION:
1. Peel and core the apples; cut the apples into small chunks.


2. In a small pot, add apples and brown sugar.


3. Add cinnamon, vanilla, and salt.


4. Pour in water.


5. Bring it to a boil over high heat.


6. Continue to boil until the apples soften and the liquid becomes sticky; about 20 minutes.


7. Meanwhile, in a mixing bowl, add flour and cubed butter. Rub the butter into the flour with finger tips, until the butter becomes pea size.


It should become like this.


8. When the apple filling is done, spoon it into a baking dish. Set aside.


9. Get a handful of the flour mixture. Squeeze to pack it into a large block.


10. Then, greenly break it onto the apple filling. The topping should be half powdery, half crumbly.


11. Place the baking dish on a baking tray. Place it in the pre-heated over at 350C for 20 minutes.
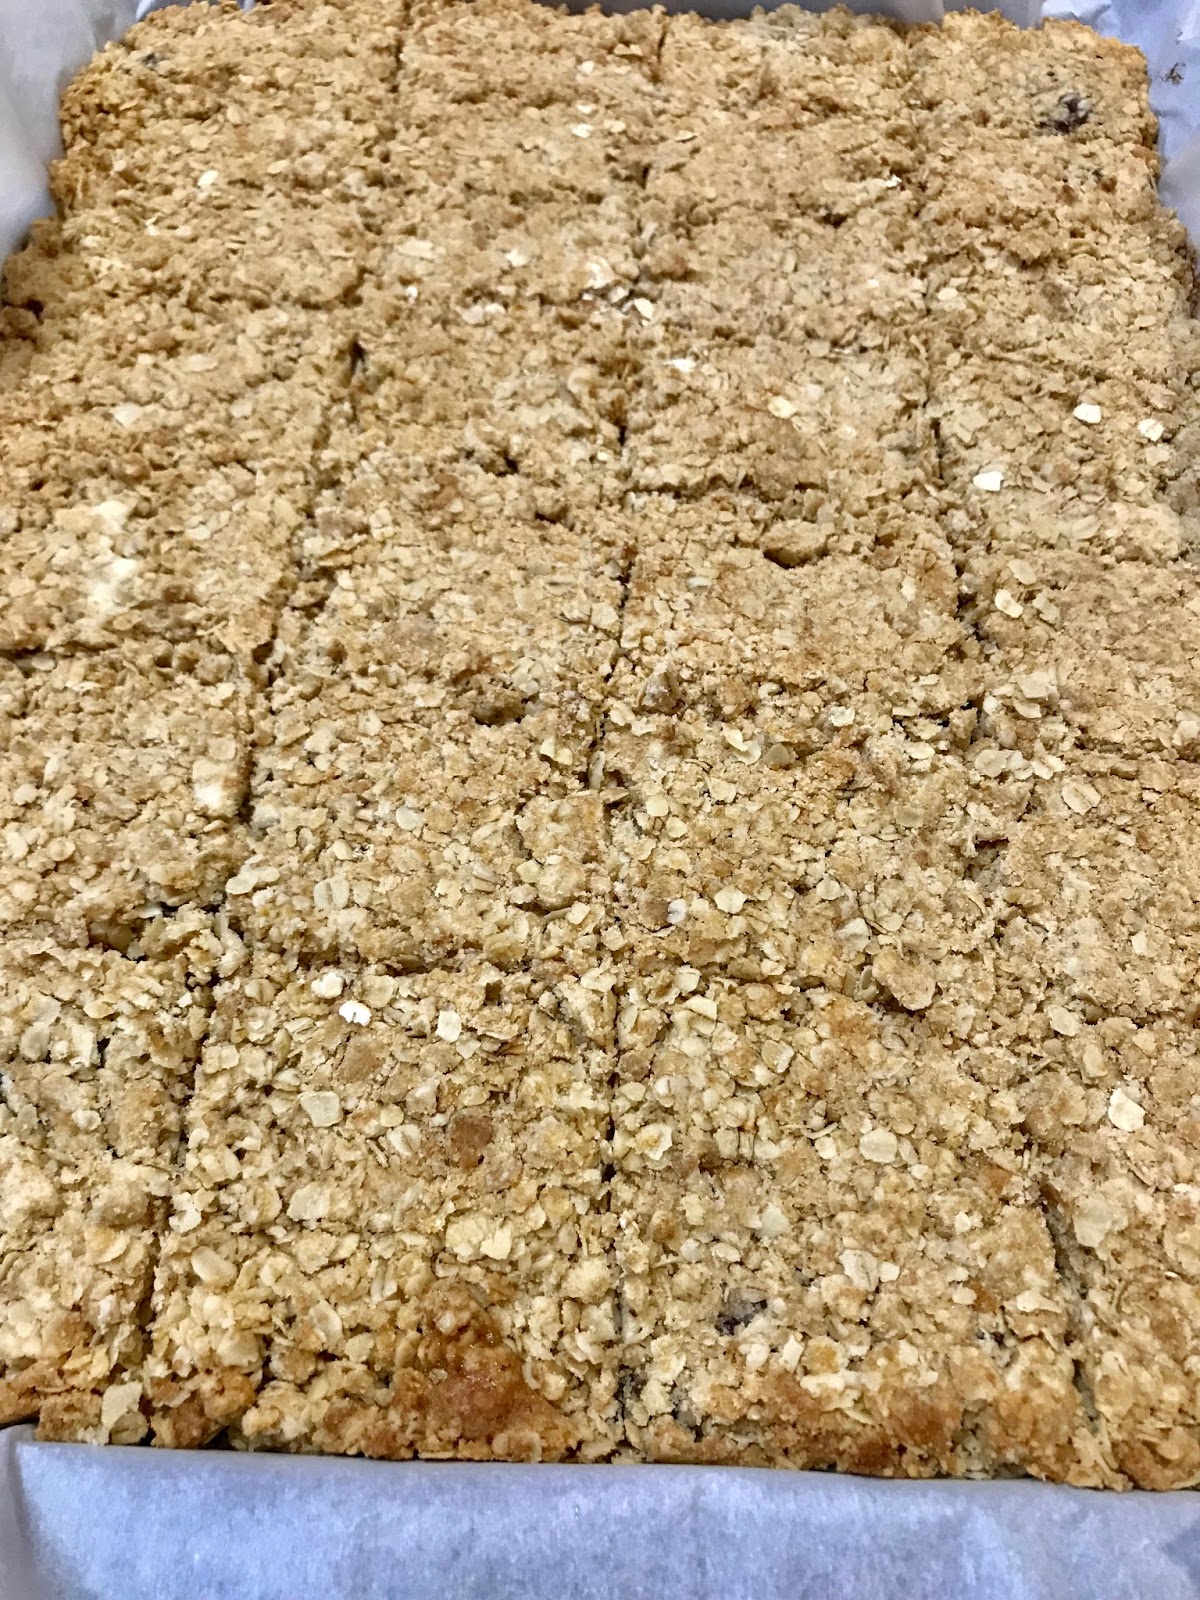

It is ready.


Monday, April 20, 2020

Mugwort Dumpling Red Bean Soup 艾草紅豆甜湯


Around Mid May, you will start to find mugwort growing on the road sides or among bushes. My husband and I like to pick a bunch whenever we see it. It has a unique fragrance that you won't forget once you smell it once. It is popular to use this wild edible plant to make into the chewy glutinous dumplings and serve them with sweet bean soup.

INGREDIENTS:
1 cup (packed) Mugwort, young leaves only
1/4 teaspoon Baking Soda
1 cup Glutinous Flour
1/2 cup Water
1 pack Red Bean Paste (store bought)

DIRECTION:
1. Pick the young leaves off the stems; rinse off the dirt.


2. Bring a pot of water to a boil over high heat. Add baking soda and mugwort. Boil until the mugwort soften; about 5 minutes. Drain well.


3. In a processor, add the cooked mugwort and about 1/2 cup of water. Blend until the mugwort is totally smooth.


4. In a mixing bowl, add the glutinous flour. Slowly add half of the mugwort liquid into the flour. Mix until it becomes dough. If it is too dry, add more mugwort liquid. The texture of the dough should feel like an ear lobe.


5. Set a large pot of water to a boil over high heat. When it comes to a rolling boil, roll a small portion of dough into a ball. Add it to the water. Repeat the process until all the dough is gone.


6. When the boiled dumplings float to the surface, it means they are done. Scoop them out and place them in cold water to stop the cooking process.


7. In a small pot, add the bean paste and some water. Stir and cook over medium heat until the paste is diluted into soup. No need to add sugar. It should be sweet enough.

8. Divide the soup into small bowls. In each bowl, add 6-8 mugwort 
dumplings. 


Thursday, April 16, 2020

Taro Sago in Coconut Milk 芋頭椰汁西米露


Taro is root vegetable, and many people have never thought of using it for dessert. Surprisingly, it pairs coconut milk amazingly well. It is one of the popular desserts in Hong Kong. Since sago is made of tapioca, it coagulates when it is cold. If you chill your dessert in the fridge, you will find it becomes sticker. Just try to stir in a little water to loosen it up when you reheat your dessert. For me, I find this dessert tastes best when it is lukewarm. I hope you enjoy this recipe.


INGREDIENTS:
1/3 Toro
1 cup Sago
3 cups Coconut Milk (I used Real THAI)
2 cups Water
Rock Sugar to taste
1/8 teaspoon of Salt

DIRECTION:
1. Cut off and discard the taro skin. Cut the taro into dices; set aside.

2. Bring a large pot of water to a boil over high heat. Add sago, and boil it for 10 minutes. Turn off the heat and allow the remaining heat to cook it continuously for another 10 minutes. (Don't worry if you still see the white dots in the middle of the sago at this point)

3. Drain the sago; rinse it under running water until it is no longer like a cake. Set aside.

4. In a pot, add coconut milk, water, rock sugar and taro. Bring it to a boil over high heat and then cook it for another 10 minutes until the taro is slightly soften. (You don't want to over boil it or the taro will be too soft and break apart and make a gooey mess of the dessert)

5. When the taro is slightly soften (the rock sugar should be dissolved by now), add the cooked sago. Stir well. Bring the dessert back to a boil and it is done. Enjoy the dessert either hot or cold.


Friday, February 21, 2020

Papaya Sweet Soup with Lotus Seed and White Fungus


It is one of the popular dessert in Hong Kong that people usually enjoy eating it through the year.  Since the white fungus is consider as 'natural collagen' due to the high amount of protein, women love to eat it regularly.  The rock sugar and lotus seeds can help nourishing dry skins or sore throat.  In summer, people like to chill this clear looking dessert before eating so that it can cool off the body from the heat.

I used the dried lotus seeds in this recipe, but it is always better if you are using fresh lotus seeds.  Remember to remove the green core that has a bitter taste.


INGREDIENTS:
1 Papaya, ripen
10-15 Lotus Seeds, core removed (I used dried lotus seeds here)
2 White Fungus
2 tablespoons Goji Berries
1/3 cup Rock Sugar (adjust it to your preference)
8 cups Water

DIRECTION:
1, Soak the white fungus in water until it is rehydrated; about 30 minutes.  Discard the yellow hard core.  Gently tear the fungus into large pieces; set aside.

2. Peel off the skin of papaya.  Cut it lengthwise and scoop out the seeds.  Cut the papaya into chunks; set them aside.

3. Bring the water to a boil.  Add lotus seeds and rock sugar.  Boil for another 15 minutes.

4. Add papaya, white fungus and goji berries.  Bring it to a boil again and then turn the heat to medium.  Continuously boil for another 20 minutes and it is done.  It is delicious to serve it both cold or hot.


Thursday, February 20, 2020

Apple Peanut Butter Morning Bar


INGREDIENTS:
1 Apple, peeled and shredded (about 1 cup)
2 Eggs
2 cups Oatmeal
1/4 cup Peanut Butter (I used nature peanut butter)
1/2 cup Honey
1 tablespoon Ground Cinnamon

DIRECTION:
1. Pre-heat the oven to 350F.

2. In a mixing bowl, whisk the eggs. Add the rest of the ingredients and mix to combine.

3. Pour the mixture on a baking tray that lined with parchment paper.

4. Bake it in the oven for 15 minutes. Take it out and cut it into equal portions. Allow them to cool before storing.


Friday, April 19, 2019

Acorn Squash and Date with Quinoa in Milk


INGREDIENTS: (4 Servings)
1/3 Acorn Squash, peeled, deseeded, and cubed
2 cups Quinoa
1.5 cups Water
8 Dried Dates, pitted
1/3 cup Pumpkin Seeds
2 cup Milk (to serve)
Honey (to serve)

DIRECTION:
1. To cook the quinoa, rinse it under running water until the water runs clean and not foamy; drain well.  Set the quinoa in a pot with 1.5 cups of water.  Bring it to a boil over high heat.  Once it's boiling, turn the heat to the lowest, cover the lid, and continue to cook for another 15 minutes or until the quinoa becomes fluffy.  It is always better to have a taste test.  Fluff the cooked quinoa with a fork and allow it to cool.

2. Meanwhile, boil another small pot of water.  Add cubed acorn squash.  Cook over high heat until tender; about 8-10 minutes.  Depends on the size of the cubes.

3. To serve, combine quinoa, squash, dates, pumpkin with milk.  Drizzle some honey for the additional sweetness if preferred.


Saturday, March 30, 2019

Black Rice with Mango Coconut Milk | 香芒椰汁黑糯米飯


INGREDIENTS:
2 cups Black Rice (sometimes referred as Purple Rice)
4 cups Water
1 Mango, Large
1/2 cup Coconut Cream
4 tablespoons Sugar
small pinch of Salt

材料:
2 杯  黑糯米 (又名紫糯米)
4 杯  水
1 個  芒果,大
1/2 杯  椰漿
4 湯匙  糖
少撮  鹽

DIRECTION 做法:
1. Rinse the black rice twice in two changes of water; drain.  Add 4 cups of water with it in a pot; let it soak for about 30 minutes before cooking it.

1. 黑糯米過水兩次洗淨;濾水。在一只鍋內加入黑糯米。


2. Bring the rice to a boil over a high heat.  When the water is nearly be absorbed, reduce the heat to the lowest, put on the lid, and continue to cook it for another 10 minutes (set the timer!)

3. When the timer goes off, remove the pot from the heat.  Keep the lid on and allow the rice to rest for at least 10 minutes before fluffing it.  Let the rice to cool completely.


4. Meanwhile, cut the mango lengthwise on both sides avoiding the pit.  Slice the flesh into cubes without cutting through the skin.  With a spoon, scoop out the cubes from the skin.


5. In a small bowl, combine coconut cream, sugar, and salt; whisk until the sugar dissolves.

6. To serve, add the rice in the bowl, spoon the coconut mixture over it and add the mango around it.

Mung Bean Sweet Soup Dessert | 陳皮綠豆沙


INGREDIENTS:
1 cup Mung Bean
5 gram Tangerine Peel, dried
7 cups Water
1 cup Brown Sugar
small pinch of Salt

材料:
1 杯  綠豆
5 克  陳皮
7 杯  水
1 杯  啡糖
少撮  鹽


DIRECTION:
1. Rinse the mung bean and then soak it in water for at least two hours. Discard the water.

2. Rehydrate the tangerine peel in water and preserve the soaking water. Scrape off the white pith with the back of a knife. Slice the peels into thin strips.

3. In a deep pot, combine all the ingredients and the preserved soaking water, except the brown sugar. Bring it to a boil over high heat and then reduce the heat to medium. Continue to boil until the mung bean softens and breaks down; stirring it occasionally to prevent it from sticking.  It takes about 1 hour. Add more water if the liquid becomes low.

4. When the mung bean is ready, add the brown sugar and stir it until dissolved.  Remove the pot from the heat and the dessert is ready.  This dessert can be served both cold and hot.

做法:
1. 綠豆沖淨,再浸水最少數小時;把水倒掉。

2. 陳皮用水浸軟, 浸過的水留起備用。用刀背刮去白色帶苦的內皮;陳皮切切絲。

3. 在一深鍋中加入所有材料和留起的水,除卻啡糖。用大火煮滾再把火調至中大火;繼續煮若1小時,期間要不時攪動以防黏底。如需要可中途多加水。

4. 綠豆煮好後,加入啡糖並攪拌至完全溶掉;離火,上桌。這甜品可熱食或涼食。


Tuesday, October 2, 2018

DIY Candied Orange Peel


The key of making bitterness-free orange peels is to remove all the pith that's attached to the outer skin, and making sure to boil them twice before simmering them in syrup.  My son and my husband always love these orange peels, and my son even tried to smuggle some to his best friends in school.  Recently I brought some to my work to share with my colleagues, and they all told me how much they enjoy them.  They didn't think you can make these at home.  Yes, for sure you can, and it is very straightforward.

INGREDIENTS:
Orange Peels (about 10 oranges)
Sugar (equal weight of the pithed orange peels)
Water

DIRECTION:
1. With a small knife, carefully cut off the pith.  This white pith will give the candied orange peels bitterness.

2. Put the pithed peels in a small pot.  Fill the pot with water just enough to cover the peels.  Bring it to a boil and then discard the water.  Repeat the boiling process again; drain well.

3. In the same pot, add sugar of equal volume to the orange peels.  Fill the pot with water just enough to over the peels.  Turn the heat to low and simmer the peels for three hours, or until the peels are bright orange colour and slightly translucent.  Remove the pot from the heat, cover, and leave it over night.

4. The next day, line up the orange peels on parchment paper without overlapping them.  Allow them to totally dry.  Keep them in an air-tight container.  You can snack on them as they are, or sprinkle them on muffins, cookies, or cakes.

Tuesday, June 26, 2018

How to make simple crepe


Crepes are something that look very elegant on the plate and always gives an impression to people that it's difficult to make.  In fact, making crepes are as easy as making pancakes.

There are so many different recipes out there which claim to make the softest and best crepes.  I will not say mine is one of those, but my crepes are soft and delicate, and still retain the softness after keeping them in fridge for a few days.

The ratio to make my style of crepe is 1:2:1 for 1 cup of flour: 2 cups of milk: 1 egg.  The melted butter is for greasing, so don't need to measure it too carefully.

Thanks for stopping by.  I hope you will try this recipe.


Simple Crepe Recipe

INGREDIENTS:
1 cup Flour
2 cups Whole Milk
1 Egg
4 tablespoons Butter, melted
1 teaspoon Vinilla Extract (optional)
a pinch of fine sea salt (optional)


DIRECTION:
1. In a bowl, whisk the egg.  Add the milk, butter, and vanilla extract and whisk again until it is well combined.

2. Add flour and salt.  Gently mix until it becomes a thin batter.  The batter should resemble to the texture of melted ice cream.


3. Heat up a small non-stick pan over medium heat.  Add a small ladle of batter in the pan while swirling the pan.  Continuously swirl the pan until the whole surface is covered. 

If you don't swirl the pan, most of the batter likely will just sit in the middle and the crepe ends up becoming uneven, with thin edges but thick centre.

4. Wait for about 1 minute and then shake the pan.  If the crepe is loose it means that it's ready to be flipped over. 


The freshly made crepe
5. Toss the pan to quickly flip the crepe over and then cook the other side for another 30-45 seconds. 


6. Transfer the crepe to a plate and loosely cover it with plastic wrap.  Repeat this process until finishing the batter.


You can make strawberry crepe by adding whip cream, halved strawberries, and icing sugar.  Or, you can add sliced banana and Nutella.

Sometimes I serve it with ham and cheese for brunch.  This crepe is wonderful to pair with both sweet and salty.  I hope you will enjoy it.


My son was excited to have crepe for breakfast, especially with the fresh strawberry he picked the day before. 


Saturday, June 23, 2018

Japanese Knotweed Oatmeal Squares |日本虎杖麥皮方塊


Japanese knotweed comes out from late April to early May.  The freshly sprouted stems are tender and juicy.  However, the stems will soon become too fibery and woody, and no longer suitable for consumption.  Look for knotweed that is less than a foot long when picking.  They generally like to grow near water, but I have seen them growing at roadsides.  


Knotweed has a tangy flavour, and it break down easily after boiling.  It makes a very pleasant sweet and sour sauce with chocolate.  To give it some texture, I thickened the sauce with some cornstarch.  However, it can be omitted if you are using more chocolate instead.


Japanese Knotweed Oatmeal Squares
日本虎杖麥皮方塊

Knotweed Filling Ingredients:
5-6 pcs Japanese Knotweed, about 1.5 cups
100 gram Chocolate Bar, semi-sweet
1 cup Brown Sugar
1 cup Water
pinch of Sea Salt
Cornstarch Slurry (2 tablespoons Cornstarch + 2 tablespoons Water)

Oatmeal Ingredients:
3 cups Whole Oats
1.5 cups All Purpose Flour
2 cups Butter
1.5 cups Brown Sugar
pinch of Salt

虎杖餡材料:
5-6 支  虎杖,若1.5杯
100 克  巧克力,半甜
1 杯  啡糖
1 杯  水
少撮  海鹽
粟米粉 (2湯匙 粟米粉 +2 湯匙 水) 

麥皮材料:
3 杯  麥皮
1.5 杯  麵粉
2 杯  牛油
1.5 杯 啡糖
少撮  鹽


DIRECTION 做法:
1. Cut the knotweed into small rounds and add them into a small pot.  Add brown sugar, water, and salt from the filling ingredients.  Bring it to a boil, and continue to boil until the knotweed has totally softened and can be broken apart easily.

1. 虎杖切小粒並放入小鍋內。鍋內加入餡料材料的啡糖、水和鹽。把虎杖煮至完全軟身。


2. Reduce the heat to medium.  Add the chocolate and stir until it is totally melted.  Add cornstarch slurry; consistently stir until the filling thickens.  It will take only about 10 seconds.  Quickly remove the pan from the heat; set it aside.

2. 把火調低至中火。加入巧克力並攪拌至完全溶掉。下粟粉水,不停攪動直至餡料變杰身;若10秒。迅速離火。


3. In a large bowl, combine all the oatmeal ingredients.  Mix together by hand until the mixture becomes crumbly.

3. 在一只大碗內,加入所有麥皮材料;用手拌勻。


4. Line a deep baking tray with parchment paper.  Add half the amount of the oatmeal and spread it evenly.  Then, add and spread the knotweed filling.  Cover the filling with the rest of the oatmeal filling.  Gently press down the top with hand.

4. 焗盤內舖上焗紙,倒入一半麥皮材料,填平。平均倒入虎杖餡料,再舖上剩餘麥皮材料。用手把其稍為壓平。


5. Bake it in the pre-heated oven at 360F for 25 minutes and until the oatmeal is golden.

5. 放入已預熱至360F焗爐,焗若25分鐘和至麥皮表面至金黃。


6. Remove it from the oven.  Cut it into equal portions when hot. 

6. 從焗爐取出,趁熱分件。


Roasted Butternut Squash Soup | 烤葫蘆南瓜湯

Compare to the non-roasted version, roasted butternut squash instead brings a tremendous different in the flavour.  The caramelized s...