Tuesday, June 26, 2018

How to make simple crepe


Crepes are something that look very elegant on the plate and always gives an impression to people that it's difficult to make.  In fact, making crepes are as easy as making pancakes.

There are so many different recipes out there which claim to make the softest and best crepes.  I will not say mine is one of those, but my crepes are soft and delicate, and still retain the softness after keeping them in fridge for a few days.

The ratio to make my style of crepe is 1:2:1 for 1 cup of flour: 2 cups of milk: 1 egg.  The melted butter is for greasing, so don't need to measure it too carefully.

Thanks for stopping by.  I hope you will try this recipe.


Simple Crepe Recipe

INGREDIENTS:
1 cup Flour
2 cups Whole Milk
1 Egg
4 tablespoons Butter, melted
1 teaspoon Vinilla Extract (optional)
a pinch of fine sea salt (optional)


DIRECTION:
1. In a bowl, whisk the egg.  Add the milk, butter, and vanilla extract and whisk again until it is well combined.

2. Add flour and salt.  Gently mix until it becomes a thin batter.  The batter should resemble to the texture of melted ice cream.


3. Heat up a small non-stick pan over medium heat.  Add a small ladle of batter in the pan while swirling the pan.  Continuously swirl the pan until the whole surface is covered. 

If you don't swirl the pan, most of the batter likely will just sit in the middle and the crepe ends up becoming uneven, with thin edges but thick centre.

4. Wait for about 1 minute and then shake the pan.  If the crepe is loose it means that it's ready to be flipped over. 
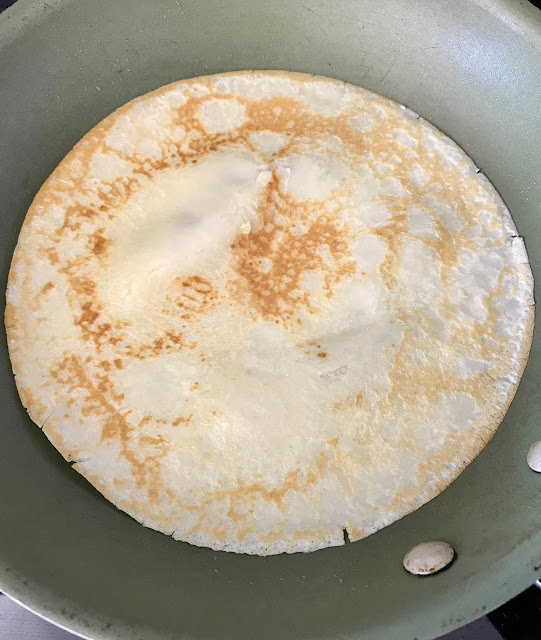

The freshly made crepe
5. Toss the pan to quickly flip the crepe over and then cook the other side for another 30-45 seconds. 


6. Transfer the crepe to a plate and loosely cover it with plastic wrap.  Repeat this process until finishing the batter.


You can make strawberry crepe by adding whip cream, halved strawberries, and icing sugar.  Or, you can add sliced banana and Nutella.

Sometimes I serve it with ham and cheese for brunch.  This crepe is wonderful to pair with both sweet and salty.  I hope you will enjoy it.


My son was excited to have crepe for breakfast, especially with the fresh strawberry he picked the day before. 


Rilakkuma Banana Pancake | 鬆弛熊香蕉熱香餅


Do you have any overly ripe bananas sitting on the countertop? If so, you can turn them into banana pancakes.  My son loves banana pancakes, so we always purposely buy extra bananas and wait for them to be "spotty".

Two bananas are sufficient enough to make a stack of pancakes of ten.  If you want to give your bear a little more "honey skin tone", you can add a little sugar in the batter.


Rilakkuma Banana Pancake
鬆弛熊香蕉熱香餅  
INGREGIENTS:
1 1/4 cups Plain Flour
2 Eggs
1 Banana, soft or ripen
1 cup Milk
1/3 cup Butter, melted

DECORATION:
1 Banana
Chocolate Chips
Strawberries (optional)


材料:
1 1/4 杯   麵粉
2 隻   雞蛋
1 條   香蕉,半熟或熟透
1 杯   牛奶
1/3 杯   溶牛油

裝飾:
1 條   香蕉
巧克力粒
草莓 (隨意)


DIRECTION:

Saturday, June 23, 2018

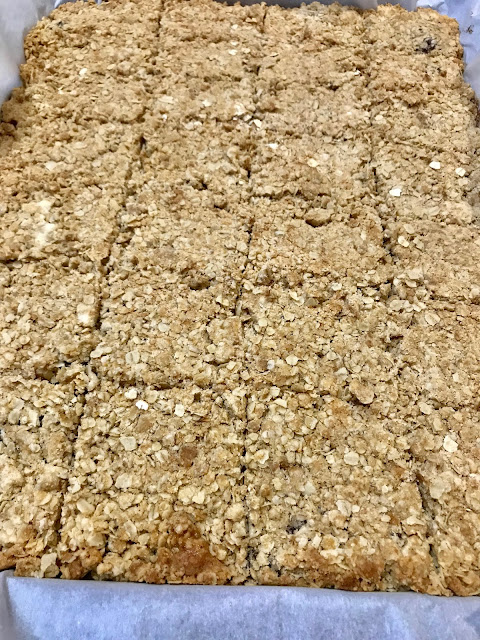
Japanese Knotweed Oatmeal Squares |日本虎杖麥皮方塊


Japanese knotweed comes out from late April to early May.  The freshly sprouted stems are tender and juicy.  However, the stems will soon become too fibery and woody, and no longer suitable for consumption.  Look for knotweed that is less than a foot long when picking.  They generally like to grow near water, but I have seen them growing at roadsides.  


Knotweed has a tangy flavour, and it break down easily after boiling.  It makes a very pleasant sweet and sour sauce with chocolate.  To give it some texture, I thickened the sauce with some cornstarch.  However, it can be omitted if you are using more chocolate instead.


Japanese Knotweed Oatmeal Squares
日本虎杖麥皮方塊

Knotweed Filling Ingredients:
5-6 pcs Japanese Knotweed, about 1.5 cups
100 gram Chocolate Bar, semi-sweet
1 cup Brown Sugar
1 cup Water
pinch of Sea Salt
Cornstarch Slurry (2 tablespoons Cornstarch + 2 tablespoons Water)

Oatmeal Ingredients:
3 cups Whole Oats
1.5 cups All Purpose Flour
2 cups Butter
1.5 cups Brown Sugar
pinch of Salt

虎杖餡材料:
5-6 支  虎杖,若1.5杯
100 克  巧克力,半甜
1 杯  啡糖
1 杯  水
少撮  海鹽
粟米粉 (2湯匙 粟米粉 +2 湯匙 水) 

麥皮材料:
3 杯  麥皮
1.5 杯  麵粉
2 杯  牛油
1.5 杯 啡糖
少撮  鹽


DIRECTION 做法:
1. Cut the knotweed into small rounds and add them into a small pot.  Add brown sugar, water, and salt from the filling ingredients.  Bring it to a boil, and continue to boil until the knotweed has totally softened and can be broken apart easily.

1. 虎杖切小粒並放入小鍋內。鍋內加入餡料材料的啡糖、水和鹽。把虎杖煮至完全軟身。


2. Reduce the heat to medium.  Add the chocolate and stir until it is totally melted.  Add cornstarch slurry; consistently stir until the filling thickens.  It will take only about 10 seconds.  Quickly remove the pan from the heat; set it aside.

2. 把火調低至中火。加入巧克力並攪拌至完全溶掉。下粟粉水,不停攪動直至餡料變杰身;若10秒。迅速離火。


3. In a large bowl, combine all the oatmeal ingredients.  Mix together by hand until the mixture becomes crumbly.

3. 在一只大碗內,加入所有麥皮材料;用手拌勻。


4. Line a deep baking tray with parchment paper.  Add half the amount of the oatmeal and spread it evenly.  Then, add and spread the knotweed filling.  Cover the filling with the rest of the oatmeal filling.  Gently press down the top with hand.

4. 焗盤內舖上焗紙,倒入一半麥皮材料,填平。平均倒入虎杖餡料,再舖上剩餘麥皮材料。用手把其稍為壓平。


5. Bake it in the pre-heated oven at 360F for 25 minutes and until the oatmeal is golden.

5. 放入已預熱至360F焗爐,焗若25分鐘和至麥皮表面至金黃。


6. Remove it from the oven.  Cut it into equal portions when hot. 

6. 從焗爐取出,趁熱分件。


Thursday, June 21, 2018

Tomato Beef Egg Drop Soup with Rice | 蕃茄牛肉蛋花湯飯


Almost every family has its own recipe for egg drop soup.  Although the basic ingredients are around tomatoes, beef, and egg, there are so many ways to play around with them to make the soup suit your taste buds and the weather.

The soup my mom made when I was little had very little red meat because red meat was a luxury throughout my childhood.  Mom then would add lots of tomatoes and eggs to enhance the flavour and nutrition.  The tangy flavour always brought up our appetite especially on some hot days.

Thankfully now that meat is no long a luxury for us we are able to add as much beef as we like.  This soup is a quick and healthy recipe that is great to make on a weekday.  Hope you will enjoy it.


INGREDIENTS: (4 servings)
3 Tomatoes, large, cut into wedges
150 gram Beef
4 Eggs, beaten
1 bunch Cilantro, leaves only, rinsed
1 stalk Scallion, cut into around
4 cups Water
2 tablespoons Vegetable Oil
4 bowls Cooked Steamed Rice, Link

Seasoning:
4 tablespoons Light Soy Sauce
1 tablespoon Sugar
1/3 teaspoon White Pepper, ground
1 teaspoon Sesame Oil
1/3 teaspoon Salt

材料:(4人份)
3 個。蕃茄,切瓣狀
150 克  牛肉
4 隻  雞蛋,打勻
1 束  莞茜,葉部份,洗淨
1 條  青蔥,切粒
4 杯  水
2 湯匙  菜油
4 碗  白飯,連結

調味料:
4 湯匙  豉油
1 湯匙  糖
1/3 茶匙  白胡椒粉
1 茶匙  麻油
1/3 茶匙  鹽

DIRECTION :
1. Slice the beef against the grain into 1/2 cm thick stripes.  Combine them with the seasoning; mix well.  Set it aside.

2. In a soup pot, add vegetable oil and heat it up over high heat.  Add tomato slices.  Fry them until they start to become soft; about 2 minutes.

3. Add beef and fry until it starts to turn colour.  Add water, cilantro, and scallion.  Continue to cook until the soup comes back to boil again.  Slowly add in the egg in a ribbon style.  Turn off the heat and serve it with cooked steamed rice.

做法:
1. 牛肉逆紋切成半厘米薄片。下調味料;拌勻。

2. 在湯鍋內下菜油,用大火燒熱。下蕃茄,炒至開始變軟;若2分鐘。

3. 下牛肉片,快炒至其開始變色。下水、莞茜和蔥。繼續煮至湯翻滾。將蛋慢慢倒入鍋內形成蛋花狀;離火。 配以白飯食用。


Saturday, June 16, 2018

Stir fried Egg with Preserved Radish | 菜脯炒蛋


Preserved radish is a common ingredient in Hong Kong.  We often use it in stir fry eggs or pork, or serve it as a side dish with plain congee.

Making preserved radish requires two main simple steps.  Rubbing salt on the radishes and laying them under the hot sun to dry during the day, and storing them away at night.  This process needs to repeat for at least two weeks before they are stored in a sealed container for another three months.  The preserved radishes we normally see in the market are golden colour to slight brown; they are fresh preserved radishes.  However, the preserved radishes that are stored up to ten years are black in colour, and the ones over twenty years will release black oil, which some people believe has a medical purpose and cherish it a whole lot.

My friend knows my husband and I like preserved radish.  So when she saw that there were such good quality ones for sale at the market, she bought me some.  They smelled so fragrant.  I wanted to use that to stir fry pork belly, but we are on a diet right now so I scrambled eggs with them instead.


INGREDIENTS:
8 Eggs, large, beaten
2 pieces Preserved radishes, rinse off the salt
3 tablespoons Vegetable Oil

材料:
8 隻  雞蛋,大,打勻
2 條  菜脯,沖淨鹽份
3 湯匙  菜油


DIRECTION 做法:
1. Cut the preserved radishes into fine pieces.  Add them in a pan with a tablespoon of vegetable oil.  Sauté them over high heat until fragrant; remove them from the pan.

2. Add the rest of the oil in the same pan.  Add beaten egg and scramble it until half set.  Add the preserved radish back to the pan and continue to cook until they mix evenly.  Serve immediately.

1. 菜脯切成幼粒。在一只鑊中加入一湯匙油和茶脯,大火炒至其香氣四溢;盛起備用。

2. 在同一鑊中下剩餘的油。倒入雞蛋,快炒至半凝固。菜脯回鑊,與蛋炒至均勻;上桌。


Thursday, June 14, 2018

Asian Moon Scallop, Chinese Yam and Corn Soup | 日月魚淮山煲粟米蘿蔔湯


Before my mom told me those dried Chinese yam slices she brought me from Hong Kong were unbleached, I didn't know that some were bleached.  I always thought their white colour was natural.  Actually, the unbleached yams are a little off-white colour and are almost light grey.

Today it was a rather warm day so I decided to make some soup that was light and sweet.  The corn was in season.  four ears of corn sold for only one dollar.  Although they were small, it was good enough just to make soup.  I throw in the half bag of carrots that were left from the last weeks grocery, and a handful of lotus seeds and goji berries I always have on hand.  But when it came to the Asian moon scallops and Chinese Yam, I counted them like counting pearls before I put them into the soup pot.  Those were from my Mom who brought them from Hong Kong on her last visit.  They were memories and they are also expensive, I didn't want to finish them all too quickly.

Particularly the Asian moon scallops.  Mom said the taste of them are strong and the use of one bunch is already sufficient.  More than one is called a waste.  But I don't use them often, so I told myself two bunches was fine.  Since I didn't put any pork bone into the soup, the two bunches of scallops just brought the right taste to the soup.

You can always serve the soup with the ingredients inside.  Nothing should go to waste.

Thanks for stopping by.  I hope you enjoy the recipe.


INGREDIENTS:
2 bundles Asian Moon Scallops, about 10 pcs
7 pcs Chinese Yam, dried
3 Corn
4 Carrots
15-20 Lotus Seeds, dried, core removed
2 tablespoons Goji Berries
8 cups Water
Salt to taste

材料:
2 束  日月魚,若10條
7 塊  乾淮山
3 條  粟米
4 條  蘿蔔
15-20 粒  乾蓮子,去芯
2 湯匙  杞子
8 杯  水
鹽  調味

DIRECTION 做法:
1. Rinse all the ingredients.

2. In a deep pot, add all the ingredients and 8 cups of water.  Bring it to a boil over high heat. Then, reduce the heat to medium-high and continue to boil for another 40 minutes.  During the cooking process, add 1-2 cups of water if needed.  Season the soup with salt to taste.

1. 材料沖淨,加入湯鍋。

2. 加入8 杯水。用大火煮滾後再調至中大火,繼續煲若40分鐘。中途如需要可加1-2 杯水。最後下鹽調味。

Basic Whole Wheat Waffle | 基本全麥窩夫做法


Having planned to buy a waffle machine for a while, I finally found one on sale on Amazon, although it wasn't the Belgian waffle style I originally looked for.  It was okay.  The waffles still made my husband and my son so happy.

The waffle batter is very similar to the pancake one, but the waffle batter doesn't have milk and is slightly thicker.  Since I don't need to stand at the stove and wait to flip them, I would say making waffles are much less work than making pancakes.


It was a very nice day with blue sky and breezes.  We'd planned to go on a hike on the bruce trail near Milton.  But my son was throwing a big fit for a long time just because he did not want to brush his teeth.  After things settled, it was already too late to go.  He was so upset.

Luckily the next day also had fine weather, so we decided to go to the park nearby to fly a kite.  My son was beyond excited (because before I told him the consequence for his fit yesterday was staying home).  He didn't expect he could fly a kite.  But he apologized and behaved very well afterward.  He got changed at his highest speed and grabbed bubbles and a football to go with him.

I never knew that my husband was really good at flying a kite.  It seems that when he threw the kite, it automatically climbed up to the sky.  My son laughed loudly in excitement.  He kept running left to right along the wind as my husband told, and let the string go loose.  The kite became a small dot in the blue sky.  I was watching them while resting on a bench.  It was nice to just sit and enjoy the sun. It was all I needed after the whole week of hard work.


Yesterday I spent lots of time finally cleaning up our garden. I planted radishes, carrots, and potatoes and my husband helped me set up the nice flower planter.  My son picked this yellow cactus to add to our garden; he said yellow is his favourite colour and cactus is one of his favourite plant.  My son always has so many favourites of something.  But the cactus indeed looked special so I also got a pink one for my mother in-law as a belated Mother's Day gift.

Thanks for stopping by. I hope you enjoy this little story and the waffle recipe.


INGREDIENTS:
2 cups Whole Wheat Flour
2 teaspoons Baking Powder
pinch of Sea Salt
2 tablespoons Vanilla Extract
2 Eggs
1/3 cup Butter, melted

DIRECTION:
1. In a bowl, combine flour, baking powder, and salt; set aside.

2. In a separate bowl, beat together the rest of the ingredients.  Then, add in the flour mixture; mix well until it becomes smooth batter.

3. Preheat the waffle machine and set it to medium-high heat.  Add two spoonfuls of batter and cook until it is well set and slightly crispy.  Serve it with maple syrup.


Sunday, June 10, 2018

Cold Mushroom Cream Cheese Dip |蘑菇忌廉芝士沾醬


This long weekend my son was at my in-law's, so my husband and I got some of our own time together.  Since it was a rainy day, we decided to go to St. Lawrence Market to look for some fresh local vegetables and to stay dry.

Honestly, my husband is not the guy who enjoys looking at vegetables, so he suggested to find something to eat right after we entered the market.  It was bustling and filled with people's chatters and laughs, just like any Sunday markets.  My heart lifted, I felt alive.

There were a few seafood shops right beside the entrances, but one of the shops in particular offered dine-in service.  It brought out our excitement.  We have oysters once in a while, but we usually brought them home and shucked them ourselves, because that way was cheaper and more comfortable anyways.  It'd been a long time since we sat at the restaurant and enjoyed well prepared oysters that I didn't need to scrub and shuck.  We like creamy oysters so we ordered European flats and Blue point oysters, plus some seasonal clams.  Our mouths started to water.


Other than the variety of fresh seafood, they also had a pretty complete section of condiments for oysters and clams - rose vinaigrette, mignonette, cocktail sauce, Japanese soy sauce, and lemon wadges.  My husband and I tried each on the clams and we both agreed that the best condiment is just a few drop of fresh lemon juice.  They were good, but not as fresh as we expected.  And they were quite sandy around the edges.  Apparently the staff didn't scrub the clams and oysters well before shucking them.  We were a bit disappointed.  

After we finished the whole tray of seafood, we actually felt like more oysters.  The good quality oysters.  So we decided to drive to Diana's Seafood across town where we could always buy the best oysters.  I was hoping to get a case of sixty, but my husband insisted on just buying the fifteen for the two of us because we would have no way to finish them.  But I recalled last time when we bought the oysters, I ate nearly thirty just by myself.  I am not kidding.  I am truly an oyster craver and I have a very strong stomach for that.  We ended up settling on thirty of the European flats.  I carefully scrubbed them under running water with a toothbrush as always.  They tasted much creamier and fresher than the ones we had this morning, and they were sand free!


I learned how to shuck oysters long ago when I was working at a fine dining restaurant.  I used to be able to do it so fast, but now my skill was rusty.  And, I started to enjoy just sitting and eatting the shucked oysters rather than serving them.  I showed my husband how to do it.  He succeeded in one take, which took me nearly ten attempts back then.  He showed me a winner's smile and took the shucking knife from my hand.  I was delighted.  I immediately pulled the bowl of lemon wedges closer to myself and got ready to be served.  My husband patiently took on the role until all the oysters were down into our tummies.  For a man who rarely set foot in the kitchen, he was very sweet.

I also prepared this mushroom dip for our Entree.  You can use white mushrooms instead of the brown ones, but I like the contrasting colours on the dip.  Wrap it tightly, and it can keep well for at least 4 days.


INGREDIENTS:
7-9 Brown Button Mushrooms, rinsed
1 pack Cream Cheese, 250 gram
1/3 cup Coriander, leaves only, roughly chopped, squeeze out all the juice
1/2 Lemon of Juice
1/3 teaspoon Sea Salt

材料:
7-9 顆  蘑菇
1 盒  忌廉芝士,250克
1/3 杯  莞茜,葉部份,切碎,搾乾多餘水份
1/2 個 檸檬
1/3 茶匙  海鹽

DIRECTION 做法:
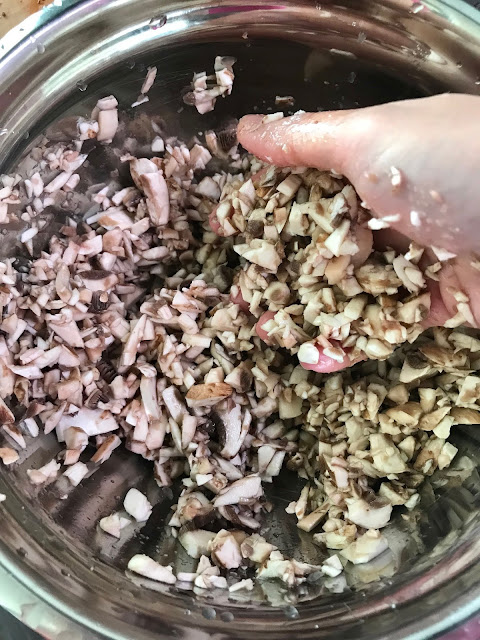
1. Roughly chop the mushrooms and place them in a bowl.  Add sea salt and lemon juice and mix well; leave them for about 10 minutes.  Squeeze out all the excess juice.

1. 蘑菇切碎,加入大碗內。下海鹽和搾入檸檬汁;拌勻。靜置10分鐘;搾乾水份。


2. In a clean bowl, combine the chopped mushroom, chopped coriander, and cream cheese.  With a spatula, mix everything until well combined.

2. 下莞茜和忌廉芝士;用力拌勻便成。


3. Serve it with tortilla chips or crackers.  This mushroom dip can be kept in the fridge up to four days.

3. 配以墨西哥玉米片或梳打餅食用。封好,可處存在雪櫃內若4天。


Friday, June 8, 2018

Garlicky Tomato Spinach Salad |蒜辣車厘茄菠菜沙律


The farmers market near my work has finally opened.  During the morning walk today with the children, we took the opportunity to visit the local farmers and showed the children those beautiful seasonal vegetables.  They were so excited when they saw the yummy fruits and tomatoes they always like.  I bought a small box of mixed cherry tomatoes to make salad for the dinner.  My husband loves to see those colourful vegetables.  To add some kick to the ordinary green salad, I added some minced garlic.


INGREDIENTS:
1 cup of Cherry tomatoes, halved
3 cups Baby spinach
2 sprigs of Basils, leaves only, thinly sliced
5-7 Garlic Cloves, minced
3 tablespoons Olive Oil
2 tablespoons Balsamic Vinegar

材料:
1 杯  車厘茄,切半
3 杯  菠菜
2 枝  九層塔,菜部份
5-7 顆  蒜頭,切幼粒
3 湯匙  橄欖油
2 湯匙  意大利黑醋

DIRECTION 做法:
1. In a large bowl, add all the ingredients.  Gently toss them with hands until they are evenly mixed.  Serve immediately.

1. 在一只大碗內,加入所有材料。用手小心地拌勻;上桌。


Basic Cornbread | 玉米麵包


Cornmeal is made of a type of corn called dent corn. Unlike the sweet corn we usually use for salad or barbecue, dent corn has little sweetness and contains higher starch. After drying and various grinding processes, dent corn becomes cornmeal that is fine to coarse in consistency, depending on the range of grinding. Cornmeal is widely used for making cornbread, polenta, or tortilla, and it comes in yellow or white colours.

Actually, cornbread originated with Native Americans. Before the European settlers set foot on America, the Natives had already had a long history of using the dried cornmeal to make cornbread as their staple.  But the original recipe is very basic, combining just cornmeal and water, or sometimes lard.  So the taste was rather bland. Later the Europeans adopted the recipe and added milk and butter to make it more flavourful.

We should really thank the Native Americans.


INGREDIENTS:
1/4 cup Butter
1 cup Milk
2 Eggs, large
1.25 cups Yellow Cornmeal
1 cup All Purpose Flour
1/2 cup Sugar
2 tablespoons Baking Powder
pinch of Sea Salt

做法:
1/4 杯  牛油
1 杯  牛奶
2 隻  雞蛋,大
1.25 杯  黃玉米粉
1 杯  多用途麵粉
1/2 杯  糖
2 湯匙  泡打粉
小撮  海鹽


DIRECTION:
1. Preheat the oven to 350F.  Melt butter in microwave; let it cool.

2. In a large bowl, whisk two eggs.  Add melted butter and milk; whisk again until it is combined.

3.  Add all the remaining ingredients.  Gently mix until it is incorporated.

4. Line a baking tray with parchment paper.  Pour the mixture into the tray and smooth the surface with the back of a spoon.

5. Bake it for about 15-20 minutes, or until the corn bread rises up and is firm.  Let it cool completely on a rack before slicing them.

做法:
1. 預熱焗爐至350F 。 用微波爐熱溶牛油;放涼。

2. 在大碗內打勻兩隻雞蛋。下牛油和牛奶;攪打至均勻。

3. 加入剩餘材料;拌勻成麵糊。

4. 焗盤上舖上焗紙,倒入麵糊,用匙背舖平。

5. 焗15-20分鐘。取出,置架放涼。

Roasted Butternut Squash Soup | 烤葫蘆南瓜湯

Compare to the non-roasted version, roasted butternut squash instead brings a tremendous different in the flavour.  The caramelized s...