Saturday, May 27, 2017

Mugwort - the wild edible and recipes |艾草食譜


Mugwort is an aromatic plant that grows widely across both cities and countryside.  If you learn to recognize them, you will be surprised how many of them actually are available around you.

I love the subtle sage-like flavour of mugwort.  Before I learnt foraging, I used to buy packs of dried mugwort leaves to make mochi (a type of Japanese glutenous sweet).  I thought mugwort was some plant that you need to get deep in the wood and normal people would not have the novelty to forage it.  So, after I learnt to recognize mugwort and started to spot them everywhere, I laughed at how silly I was spending money at the shop to buy mugwort.


Mugwort can grow more than six feet tall, and it has either pinkish flowers or light yellow flowers.  However, young mugwort is easy to overlook among other green plants.


Top on the left and underside on the right.


Mugwort’s leaves are greyish-green on the surface, and have sliver wooly hairs on the underside.  Also, some parts of the stem is purple in colour (I didn’t capture that in my photo).  When you rub it very close to the nose, you can smell a light sage-like scent.

Mugwort has an effect on stimulating blood flow around the uterus, and stimulate or ease menstruation.

SO PREGNANT WOMEN MUST NOT HAVE IT!

Many people said that mugwort can enhance vivid dreams.  I’m not sure about that because I always remember my dreams in the morning.  But putting a bunch of dried fragrant mugwort in the bedroom would be a nice idea.

For me, mugwort is a flavoring in dishes.  I use it in soup, dessert, or tea.


Mugwort Salmon Soup


Ingredients:
1 pc Salmon, cut in bite size
1 handful Fresh Mugwort, leaf part only
4 cups Water
1/2 cup Milk
Salt to taste


How to make:
1. In a pot, combine the water and milk.  Bring it to a boil.

2. Add salmon and mugwort.  Continuously boil until the liquid comes back to a rolling boil again. Reduce the heat to medium.

3. Skim off the foam.  Allow it to cook for another 5 minutes. Season it with salt.


Mugwort Panna Cotta


Ingredients:
1 cup Fresh Mugwort, leaf part only
3 cups Whole Milk
1/3 cup Sugar
8 gram Agar Agar
a small pinch of salt


How to make:
1. Combine all the ingredients in a pot.  Bring it to a boil. Reduce the heat to a simmer and let it simmer until the agar agar is totally dissolved; about 20 minutes.

2. Drain and discard the mugwort.  Divide the liquid evenly into the serving containers.  Chill until it is set.


Mugwort Evening Tea


Ingredients:
A small handful of Fresh Mugwort Leaves
Hot Water


How to make:
1. Bring a cup of water to a rolling boil.

2. In a cup, add the washed mugwort.  Pour in the hot water.  Let it steep for about 8 minutes.


Mugwort Mochi (Glutinous Rice Ball


Ingredients: for 4 mochi 
1 big handful of Fresh Mugwort, leaf part only
100 gram Glutinous Flour
150 ml Water
Corn Starch for coating
Red Bean Filling or any type of sweet filling


How to make:
1. To make the mugwort juice, combine the mugwort and water in a pot and bring it to a boil.  Then, reduce the heat to medium-low and boil it for another 5 minutes.  Turn off the heat and let it cool.

2. When the liquid is completely cool, blend it in a food processor. 
Drain and discard the mugwort leaves.  Measure the liquid; you will need about 150 ml for this recipe.  Adjust the liquid with water if it’s needed.


From left to right.

3. Add the glutinous flour into the liquid gradually and mix it with a spoon.  Make sure the mixture has no lump.

4. Cover the bowl with a lid.  Heat up the mixture in the microwave for 45 seconds.  Take it out.  Stir it vigorously with a spoon until it is sticky.  (It should be done in 10 seconds).  Cover the bowl again. Heat up the sticky mixture for another 40 seconds.  Take it out and stir it again.


From clockwise.

5. On a large plate, sprinkle a generous amount of corn starch.  Pour the sticky dough on it.  Coat both sides of the dough with cornstarch to prevent stickiness.  Stretch the dough flat and divide it into 4 equal portions.

6. Press down a piece of dough, and then put a spoonful of filling in the middle.  Wrap up four corners and place the mochi up-side-down.


Monday, May 22, 2017

Home-brew Ginger Ale | 自釀農村味薑酒


You don’t need any fancy equipment to make this delicious beverage.  All you need is a pasta container.

I started to make my own alcoholic drinks a few years ago.  I realized that to make your own wine is a big step to being more self-sufficient.  Also, it’s really awesome when you share your homebrew wine with your family and friends.

For this recipe, I used bread yeast and a pasta container as my brewing kit.

Perhaps it may sound a little absurd for many professional wine makers; however, my wine comes out crisp and gingery, and does not taste like bread or syrup after all.  I would say, it is a carbonated dry ginger ale.  The downside of this method is that the ginger ale is cloudy instead of clear.  However, you can always filter the beverage through a very fine cloth or paper towel.  I’ve never done it before.  I don’t mind the colour or the little residue on the bottom.


Home-brew Ginger Ale


Ingredients:
30 grams Ginger with skin, add more if you like stronger taste
 4 cups Water, filtered; or use spring water
1/2 Lemon of Juice
1/2 cup Sugar
1/2 teaspoon Baking Powder
1/2 teaspoon Bakers Yeast


Equipment:
A pasta container, with lid, cleaned


How to make:
1. In a pot, add the water, sugar, and baking powder. Grate the ginger into the water. Bring the mixture to a rolling boil. Then, turn off the heat and add the lemon juice. Stir well.

2. Allow the liquid to cool down to about 23C. If you don’t have a thermometer, try to taste it with your finger. It should be slightly more than luke warm.

3. Stir in the yeast and make sure it is totally dissolved.

4. Bottle the liquid up to just more than half of the container.
*This is very important to prevent the liquid from overflowing during the fermentation process*

5. Put the lid on. DO NOT SCREW IT TIGHT!!!  You just want to put the lid on without twisting it.  It must be loose enough for the gas to escape during the fermentation.  Otherwise, the bottle will explode.  Store the bottle in a dark place and check the liquid a few times a day to monitor the process.


The ginger ale will be ready in two days. I like mine dry with higher alcohol content, so I leave it in the bottle for three days before drinking it.

To bottle the drink, just simply keep the contianer in the fridge and screw the lid tight.  However, REMEMBER TO RELEASE THE GAS EVERYDAY UNTIL YOU FINISH IT.

I hope you enjoy the drink. Cheers!

Thursday, May 18, 2017

Horsetail - the wild edible | 馬尾草

Different stages of horsetails.


The medicinal plant that dates back millions of years when dinosaurs still existed.

Horsetail is a perennial plant and an invasive species that originated from temperate regions.  This plant produces two types of young shoots: fertile and vegetative shoots.  Every year, starting in early spring, this wild edible will appear in many watery areas.


Fertile shoots of the field horsetails.


The fertile shoots have brownish colour and appear asparagus like. They can be eaten raw or cooked.  Each node of the shoots contains water; it is juicy and with almost no taste when eaten raw.
However, after giving them a quick fry with some oil and garlic, these young shoots resemble the taste of the Asian dried daylily, which have a crunchy, slightly sweet and savoury aftertaste (recipe is below).  I personally prefer cooked young shoots.


A big patch of vegetative shoots (on the left). The confiler-like foliages started to grow from the stem (on the right).


Vegetative shoots emerge after fertile shoots, and usually are good from spring to early summer.  They have bright green conifer-like foliage growing around the stems. People consider vegetative shoots as a tonic rather than food due to the rich content of silica, diuretic, and minerals in them.  It is said to improve hair, nails, bones, bladder, and kidneys.  They can be dried and stored as tea leaves.

When gathering vegetative shoots, try to look for the green tops that are bright green with upward foliages.  These green tops can be dried to make beneficial tea.  It tastes somewhat similar to Japanese green tea (recipe below).  However, the green stalk and rihizom should be avoid for consumption since the enzymes inside can destroy Vitamin B1 and thiamine. Also, long-term alcohol users, people who are Vitamin B deficient, pregnant or nursing women should avoid using horsetail.  Personally, I drink horsetail tea only one or two times a week as a treat (it is really delicious) while trying to get the medical benefit from it, but I will not recommend to drink it more than that.


A colony of scouring rush besides a stream. It belongs to horsetail family.


Scouring rush belongs to the horsetail family.  It also has no leaves and no flowers.  In early spring, this plant will produce young shoots that bear lots of spores to reproduce.  Because of the roughness of this plant, people in the old time used it to polish their pots.  I haven’t yet tried this method myself, but I am planning to do it this summer when I go camping.


Stir fry Field Horsetail Shoots


Ingredients:
A handful of Field Horsetail fertile shoots
2 cloves Garlic, sliced
1 tablespoon Vegetable Oil
Salt to taste


How to make:
1. Peel off and discard the black papery rings around the stems. Rinse the shoots a few times to remove the sand and dirt.

2. Heat up the oil over medium high heat. Add garlic.  Fry it until slightly brown.  Add the shoots.  Continuously fry them until they are fragrant; about two minutes.

I tried them as a warm side dish or cold appetizer.  Both were tasty.


Field Horsetail Tea|馬尾草茶


Ingredients:
Horsetail Green Tops
Hot Water


How to make:
1. Carefully rinse the horsetail in water to remove the sand and dirt (they are quite dirty).

2. To dry the leaves, roughly cut them into 1–2 cm long.  Place them on parchment paper evenly.  Roast them in the oven at 220F until they are totally dried and be crumbled into pieces easily.  Store the leaves in a air-tight container.

3. To make the tea, bring a cup of water to a boil.  Add a tablespoon of tea leaves in a cup, then pour the hot water over it.  Let it steep for about 5–8 minutes.  Enjoy.


Friday, May 12, 2017

Dandelion Fritter | 酥炸蒲公英花蕾


Now it’s the time to savor the bright yellow dandelion heads

After days of heavy rain, we finally got a sunny day. Seas of dandelions were blooming everywhere. I am a dandelion addict. Of course I immediately thought of many ways to enjoy these freshly sprouted beauties. 

Dandelions can be prepared savory or sweet. Basically, anything you want to have a hint of dandelions, then you can add a handful of them. However, the different parts of the dandelion have the best flavour during different periods.

Roots: They are best to be harvested in early spring before the flowers bloom, or in late fall before the ground freezes. The roots store the most nutrition in these periods of the year. The roots can be ground into powder as a coffee substitute.

Buds: They can be picked any time throughout the summer. Try to look for ones that are tightly closed for the maximal floral flavour. I usually pickle them and eat them like capers.

Leaves: They could be used throughout the whole season, but I only like to use the baby dandelion leaves in early spring. They are much more tender and less bitter. If you choose to use dandelion after April, try to look for those growing in the shade because sun exposure stresses the dandelions, making them taste much more bitter. Leaves can be stir fried, to make kimchi, or eaten raw as a salad.

Flowers: We only use the yellow flower heads and they make good tea. Flower petals are not bitter so they can be applied to various recipes. I use them to make quick bread, cookies, and fritters. Some people even use them to make wine. I haven’t yet tried the wine recipe since my husband and I don’t drink much. But I imagine making a batch of it and giving it to friends as a gift would be really cool.


Dandelion Fritter


Today let’s focus on fritter. Making fritter isn’t much of a secret. All it requires is good consistency of the batter. If you want to eat the dandelion flowers but not the clumps of oily flour bread, you need to be easy on the flour. The measurement in the recipe below is just a guideline. You really need to eyeball it and feel it.


Ingredients: for 8 dandelions 
8 Dandelion Flowers, with at least 3 inch stems
2 tablespoons Corn Starch
2 tablespoons Flour
1/4 cup Water
a pinch of Salt
a pinch of Black Pepper
a pinch of Smoked Paprika
3 tablespoons Vegetable Oil


How to make:
1. the dandelions in a bowl of water by quickly swinging the flowers left and right a few times; dry them on a paper towel . (I always rinse my dandelions before using them. It may loose a little flavour, but I would rather be safe than sorry)


2. Whisk together the rest of the ingredients. The batter should be runny like the crepe batter. If it’s thick like pancake batter, you may want to thin it out with some water.

3. Heat up the oil over medium-high heat. Coat the flower heads with the batter. Add the flowers in the pan one by one and make sure they are not overlapping. Let them fry until golden; it’s about one minute. Serve immediately.


When enjoying them, just pick up the stem as if it were a toothpick and eat up the yellow flower part. They are great for party food.


If you have leftover flower heads, you can use the flower petals to make tea.


Dandelion Tea


Ingredients:
8-10 Dandelion Flower Heads, petals only
Hot Water


How to make:
1. Rinse the dandelion flower heads.  Peel off and discard any green parts.

2. Put the yellow petals in a tea cup.  Pour the hot water over it and allow it to steep for 8 minutes before serving.  Add honey or other sweetener if you want.


Thursday, May 11, 2017

Dandelion Flower Cookies and Pickled Buds|蒲公英曲奇|醃蒲公英花蕾


These bright yellow flowers are not weeds. They are food.

Starting from late spring, hundreds of thousands of bright yellow dandelions have popped up from road sides, parks, and gardens, after their look-alike cat’s ears subside.
It is the prime time to forage the dandelion buds and flowers for recipes.

Two weeks ago, I mentioned dandelion cookies to my five-year-old son. He didn’t know what they were, but he was attracted to the sound of cookies. “Mommy, if you make them, I will eat them all!” he said. So I started to look for some good dandelion for this recipe.

In the city, it may be easy to see dandelions everywhere, but it can be a challenge to look for a batch of clean ones. I need to check the environment carefully, making sure there would be no risk of car exhaust, litter, or animal droppings before getting my hands on the plants. Unfortunately, where I live is a very popular dog walking path and I don’t dare to pick any dandelions around here to feed my family, no matter how beautiful they look.

So I decided to walk around the city to look for a patch of clean dandelion. I know it may sound crazy to many people (even to my husband).  But a patch of healthy and clean dandelions means that we will be less likely to swallow chemicals or other unpleasant substances into our stomachs.


People often wonder why I treasure dandelions so much, while others just want to kill these plants with all they can. Then, it is because I know these bright yellow spring plants are food — a type of highly nutritious food. All parts of a dandelion, from the flower to the root are edible, and they are rich in Vitamin A, Vitamin C, calcium, iron, and trace minerals. When they are lying everywhere around me, I feel guilty not to use them and just let them to fade away with the season.

So when my In-laws invited us over for a dinner yesterday, I was quite excited. First, it was because I always enjoyed their company; second, it was because I could get some dandelions in their healthy lawn.

To make about 30 dandelion cookies, I used about 1/4 cup of dandelion petals. Since the green part of the dandelion heads taste slightly bitter, I omitted them in my recipe here.


Dandelion Cookies


Ingredients:
1/4 cup Dandelion Petals
1/3 cup Butter, room temperature
1 1/4 cups Flour, sifted
1/3 cup Sugar
2 Eggs
1 teaspoon Baking Soda
a pinch of Salt


How to make:
1. Pre-heat the oven to 360F.

2. Quickly rinse the flower heads in the water to remove any dirt or debris; dry them on paper towel.

3. Separate the yellow petals from the green parts. We will only use the petals for this recipe.

4. To make the dough, mix the butter and sugar until creamy. Beat in eggs and salt; continuously mix it until it’s incorporated.

5. Add in flour, 1/3 at a time. Mix it and form it into a dough. The texture of the dough should resemble your earlobes. Adjust the texture with extra flour or water if needed. Add dandelion petals and mix well.

6. Roll the dough into small balls and lay them on baking tray. Press the dough down with a folk to create the pattern. Bake them in the oven for 10 minutes.


These dandelion cookies are rich in egg flavour with a slight hint of dandelion. They are good pair with black tea.


Dandelion buds


Dandelion buds are known good for pickling and be eaten as capers. When choosing the buds, find those are tightly closed and bright green because they contain the most floral flavour.


Pickled Dandelion Buds


Ingredients:
Dandelion buds, rinsed
1 cup Hot Water
2 tablespoons White Vinegar
2 teaspoons Sugar
1 Bay Leaf


How to make:
1. Combine together the water, vinegar, and sugar; stir it until it’s dissolved.

2. Add bay leaf and dandelion buds. Chill it in the fridge for two days before using.


Friday, May 5, 2017

A Purple Dinner |紫色的晚餐


“Let’s make a surprise dinner for Daddy. How about a purple dinner?” said my 5-year-old boy.

I’d never thought that a surprise dinner can be prepared in a colour theme. It sounded beautiful enough on a plate. Red cabbage, eggplant, and blueberries are all purple, but I wanted something more special. 


Then, I remember the purple potatoes I once cooked when I was in culinary school. These potatoes are very small, with deep purple coloured skin and violet or marble coloured flesh. They taste like normal potatoes.

Normal supermarkets or shops will not carry purple potatoes so my son and I decided to take a trip to the farmers market nearby. It’s always great to be in a farmers market — the ingredients are seasonal, fresh, and special.

My son found some mini eggplants and carrots, and I found some blood oranges, black cherry tomatoes, and squid ink pasta. Perfect, the purple mission was half completed. We have enough ingredients to make a 3 course dinner.


Pan-fried Mini Eggplant with Miso Yogurt Sauce and Scallion


Ingredients:
2 Mini Eggplants
1/4 cup Vegetable Oil
a few stalk of Garlic Shoots, sliced
1 tablespoon Miso Paste
4 tablespoons Greek Plain Yogurt
Smoke Paprika (optional)


How to Make:
1. Cut the eggplants in half lengthwise. Score the flesh with a knife without cutting through the skin.

2. In a non-stick pan, heat up the oil over medium-high heat. Add eggplants with skin side down. Let them fry until the skin is crispy and the flesh is soft; it’s about 8 minutes.
3. Flip the eggplants over with the tongs. Let them fry for another five minutes. Transfer the eggplants onto the serving plate.


We planted some garlic early this month and the shoots grow like crazy. These greens are edible and delicious. They taste just like mild flavoured garlic.

4. In the same pan, add the cut scallion. Quickly stir fry it over high heat until fragrant; about 1 minute. Remove it from the heat.

5. Mix together the miso and yogurt; add a dash of it on each eggplant. Spoon some garlic shoots on top of the yogurt. Last, finish the garnish with some smoked paprika.


Squid Ink Pasta with Calamari and Black Cherry Tomatoes


Ingredients:
1 handful of Squid Ink Pasta
I handful of Normal Egg Pasta
10 small Calamari
1 cup Black Cherry Tomatoes
1/2 head of Garlic
1/2 cup Pasley, leaves only
1 Lemon juice and zest
Salt and Pepper


How to make:
1. Cut the cherry tomatoes in half. Place them on parchment without overlapping them. Roast them in the oven at 180F for about 2–3 hours, or until the cherry tomatoes are half dried up.

    2. Meanwhile, finely chop the garlic shoots and rinse the parsley; set it aside.


3. To clean the calamaris, remove the tentacles from the body by pulling two ends. Then, remove the transparent cuttlebone from the tube.

4. Cut off and discard the beak at the root of the tentacles. Keep as much ink as possible to add extra flavour for the dish later.

5. Remove the skin from around the tube part. Cut it into slices. Set them aside.


6. Bring a pot of water to a boil. Add pasta. Cook it by following the instruction on the package. Drain.

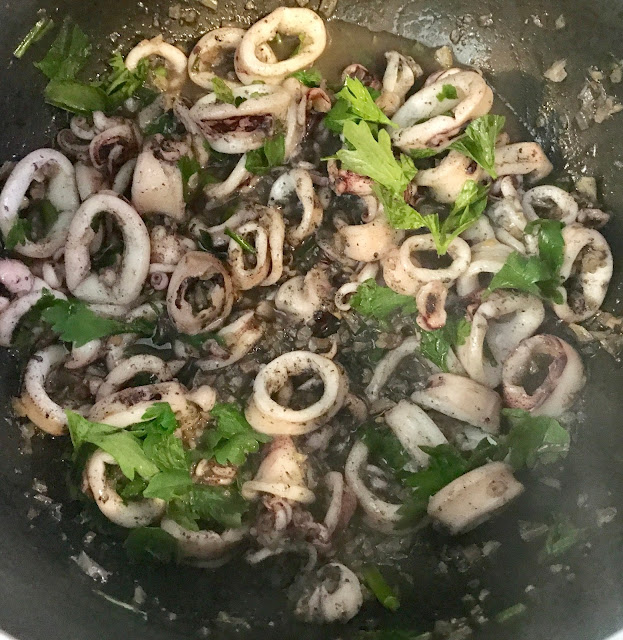
7. In a pan, heat up two tablespoons of vegetable oil over high heat. Add garlic; let it fry until it’s fragrant. Add calamari. Continuously cook until the calamari starts to shrink and then add parsley. Remove it from the heat. Add the cooked pasta. Gently mix it with the tongs. Serve it with the roasted cherry tomatoes.


Pan fried Purple Carrot and Purple Potato


Ingredients:
3 Purple Carrot, cut into 5 cm sticks, with skin on
1 cup Purple Potatoes
5 cloves Garlic, minced
4 tablespoons Vegetable Oil
Salt to season


How to make:
1. Heat up the vegetable oil over high heat. Add garlic; fry until it’s fragrant.

2. Add carrots and potatoes. Stir fry until they are half soften; it takes about 10 minutes. Season with salt.


Blood Orange in it’s own bowl


Ingredients:
Blood Orange

Tool:
1 small teaspoon
1 small knife


How to make:
1. With a small knife, cut the peel around the orange.

2. Carefully fit the handle of the spoon between the orange peel and the flesh.

3. With a rotate motion, separate the flesh from the peel. Twist gently to remove the cap.

4. Repeat the same action to the other side.


Roasted Butternut Squash Soup | 烤葫蘆南瓜湯

Compare to the non-roasted version, roasted butternut squash instead brings a tremendous different in the flavour.  The caramelized s...