Showing posts with label homesteading. Show all posts

Saturday, April 29, 2017

Japanese Knotweed - wild edible


Have you seen Japanese knotweed before?  It is a beautiful plant that may remind you of bamboo.  I think it was the reason why knotweed was introduced to North America from Japan as an ornamental plant long time ago.

In Japan and China, people are more focused on the medical benefits of the knotweed.  Knotweed contains a high amount of resveratrol, a potent antioxidant compound that can also be found in red grape skin or blueberry.  I'm not an expert on this one so I can't tell you much about how this organic compound works in our body.

For me, knotweed is a gift from nature and it tastes wonderful.  It has the tangy and subtle sweet flavour that resembles rhubarb.


Knotweed on the left, and horsetail grass on the right

Before I came across Japanese knotweed, I more often encountered horsetail grass, a species that looks very much like knotweed.  However, you can distinguish them very easily. 

In spring, Japanese knotweed is plump and round, and has reddish purple dots.  The leaves are heart shaped with two subtle purple lines on each.  Horsetail has no spots on the stem, and it has papery texture.  Both species are bamboo-like and invasive; however, knotweed is edible and the other is not.
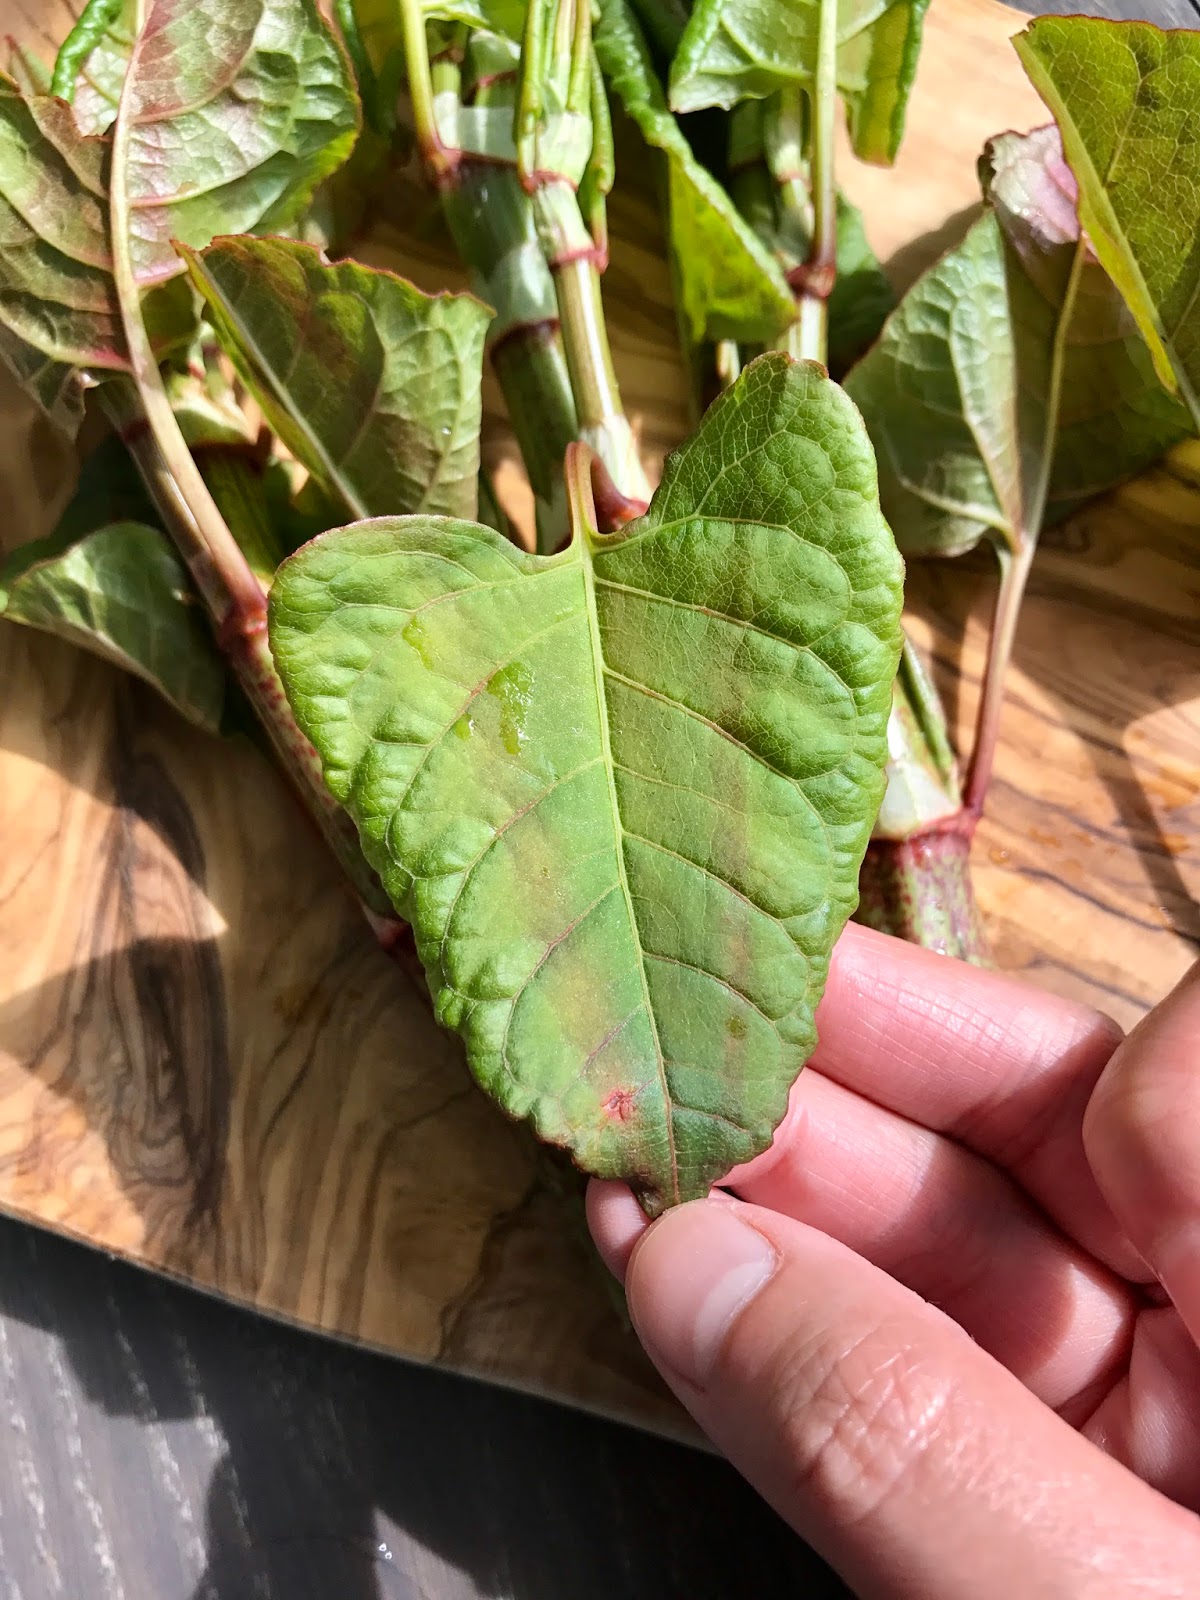

A young leaf of the Japanese knotweed.  The two lines will subside when the leaf grows more mature.


Knotweed

Young knotweed usually starts to come out in early April.  This fast growing species can grow nearly 10 cm each day up to 3 meters in height, and the root can spread up to 10 feet in depth.  The root system is very vigorous and can even break through concrete, causing much damage in houses or roads.  A strong reason why our Government wants to get rid of it and puts it under the Invasive Special Act.  I think our government has done a very good job because I rarely see knotweed around to forage anymore.
  
When foraging knotweed, we look for the young shoots that are easy to break off and are no more than 6 inches tall. Past this stage, the plants will start to become woody and will no longer be good for consumption.

Since Japanese knotweed tastes tangy and sweet, I used it to make some knotweed jam for the yogurt dessert.


Japanese Knotweed Jam

Ingredients:
1/2 cup Young Knotweed Shoots
3 tablespoons Sugar
3 tablespoons Rum Raisin

I infused the raisin three years ago and I only use it for special dessert.  If you don't have some on hand, just use raisin and a splash of rum.  Or just omit the rum.


How to make:
1. Rinse the knotweed carefully; cut it into bite sized pieces.

2. In a non-stick pot, add the knotweed and a cup of water.  Bring it to a boil and cook continuously until the knotweed is totally soft and the liquid has almost evaporated. It takes about 5 minutes.

3. Pour the cooked knotweed in a blender, including the cooking liquid.  Add raisin.  Pulse until the mixture incorporates.
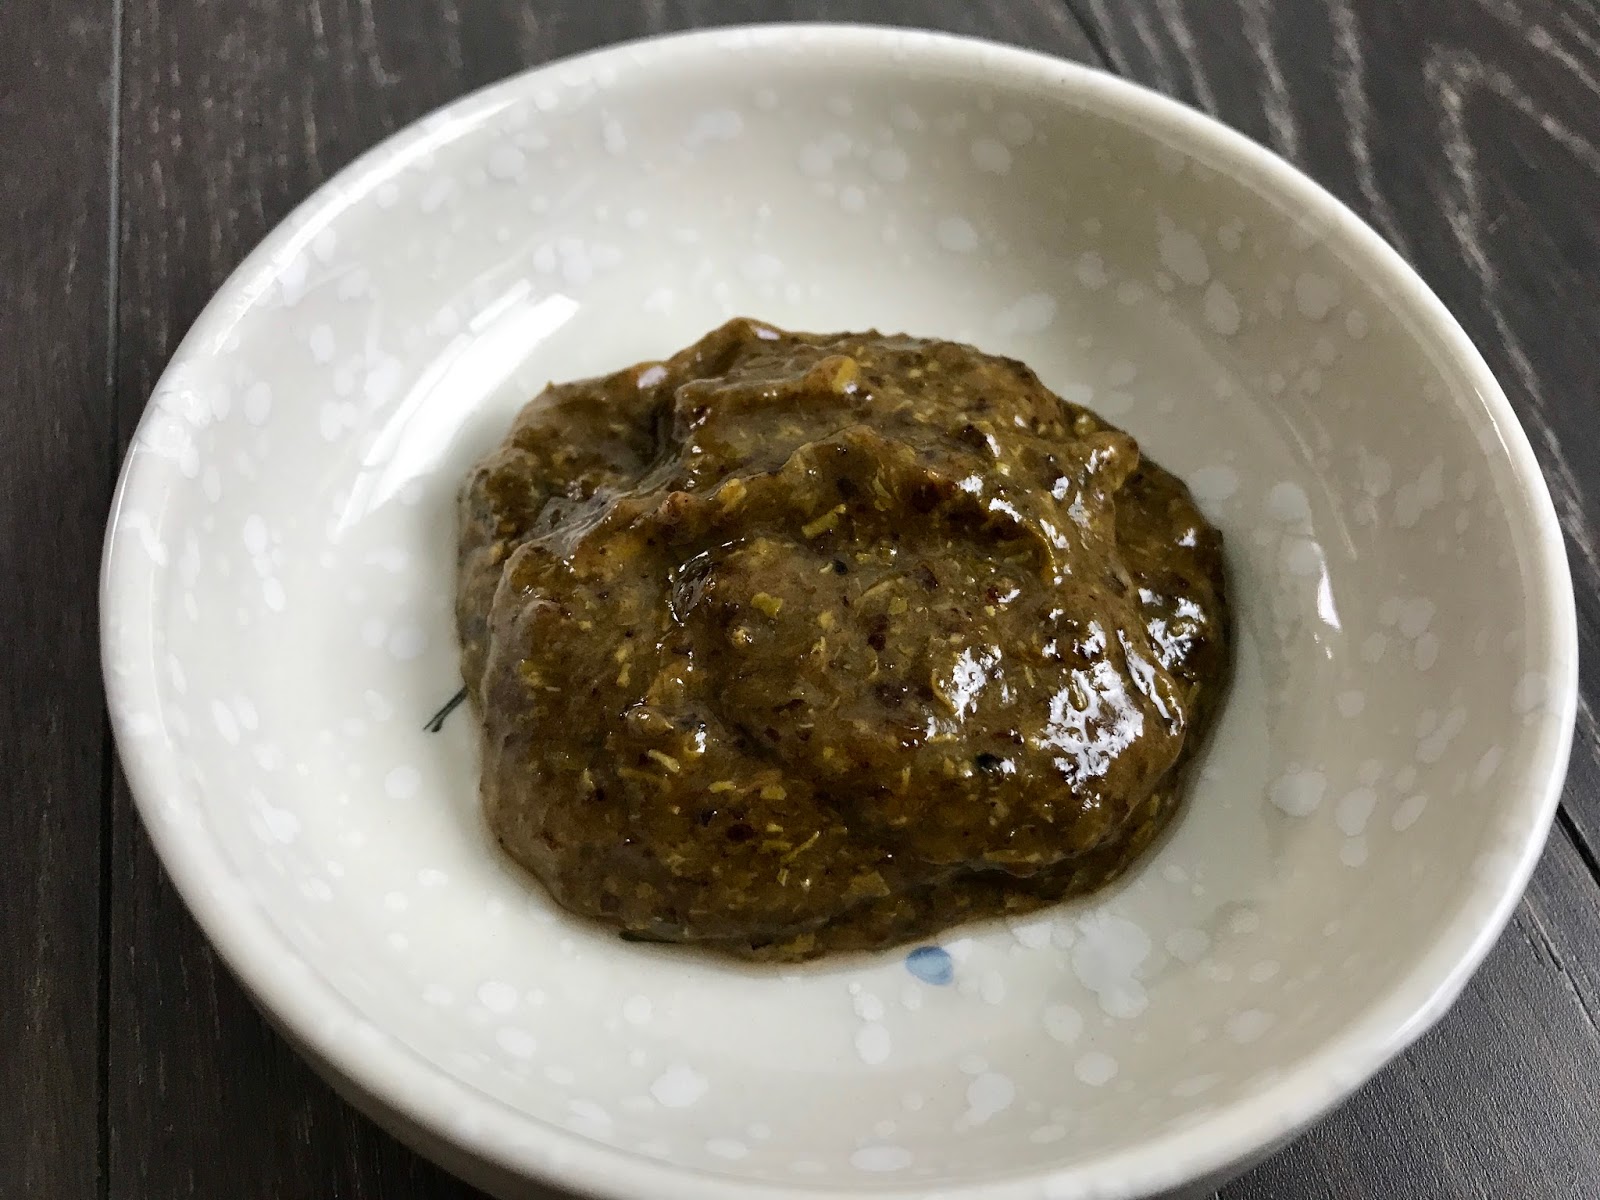


Japanese knotweed Jam


Da, da, da, da~

It is the dessert for tonight.  I must say it feels great to eat the food I forage or grow with my own hands.  There is a bond between the nature and the me inside.


Knotweed jam on greek yogurt, plus some hemp seeds and bean cracker for the garnish.


Thursday, April 27, 2017

Fermented Cabbage | 自製酸白菜


When it comes to home fermentation, a lot of people will be skeptical of trying.  Me too!  I still remember the first time I made kombucha and yogurt at home.  It was exciting but also a very stressful experience.  I worried I would poison my family with the unknown bacteria I might accidentally cultivate during the fermentation process.

As time passed, I realized that as long as you keep good hygiene during the process, control the right temperature, and use reliable ingredients, you usually will get a promising result.

The attraction to fermentation for me is that I can see the changes in the ingredients each day.  They may change colours and forms, or they may multiply and expand.  In any case, fermentation always makes good things better.  I can sit in front of my fermenting projects and watch the mould or bubbles floating around in the jars for a full hour (and I am sure my husband notices this little weird hobby of mine).

Last month, my Taiwanese friend gave me some of her homemade fermented cabbage.  I cut it up and added it to some rice cake soup.  Oh my!  That was delicious!  That was absolutely delicious!  So I  asked her for the recipe right away and she generously shared it.

Since this fermented cabbage takes at least two weeks to make, you may want to make a little more to make the waiting time worth it.  We three condo homesteaders don't have this privilege though.  Our fridge is too small that it will be a luxury to store two heads of cabbage at the same time.  So I store and eat one while fermenting another one.  When the winter comes, when I can use the balcony as an extra fridge, I will make a larger batch that can last through spring. (Good plan, isn't it?)


Fermented Cabbage

Ingredients:
Cabbage
Salt
Flour


How to make:
1. Rinse the outer layer of the cabbage; dry well.  Hold the cabbage with the stem up, and cut an X into the stem without cutting through the body, or the leaves will fall apart.  Gently spilt the cabbage into quarters.

2. On each leaf, rub a thin layer of salt.  Put the cabbage in a bowl and place some heavy object on top to compress the cabbage for several hours.  This process releases the "green taste" water from the cabbage.


3. Meanwhile, bring a pot of water to a rolling boil.  Add in the amount of salt that you would normally use for your soup.  Remove the water from the heat and allow it to cool completely   This water is the liquid to ferment the cabbage later.

4. After the salted water is completely cooled, stir in a heap tablespoon of flour.  The flour is the food for the bacteria during the fermentation process.

5. Pour out the "green taste" water from the cabbage.


6. With clean hands or tongs, transfer the cabbage into the flour water.  Make sure all the cabbage wedges are completely submerged.  Place an up-side-down plate on the top to prevent the cabbage from floating to the top.  Cover the bowl with plastic wrap and then cover the pot with the lid.  keep it at room temperature for two weeks without disturbing it.


The look during the two weeks' fermentation (from clockwise): The first day, 3 days after the fermentation, one week after the fermentation, and two weeks after the fermentation.

*If the liquid is still clear after a few days, it means your work will likely pay off.  However, if the water turns cloudy or generates an unpleasant smell, you need to throw it away because the cabbage turns bad and is unsafe for consumption.  I succeeded on this recipe the first try so I am sure you should have no problem with it too.  Just make sure to keep everything clean.


Remember to always use a glass bowl to ferment things


When I just started to learn to ferment or pickle things, I often used stainless steel bowls and I would even leave the ingredients in the bowls overnight.  But soon, I realized those stainless steel bowls "got eaten" and there were many tiny holes all over the bowl.  I couldn't figure out the cause until my husband told me it was the salt.  Salt eats everything.  "Think about how the road salt damages cars in winter", he said.   Since then, I only stick to a glass bowl when it comes to fermentation or pickling.  So no more bowls "got eaten" and I am not worried any harmful substance will leak into my food.


Now these delicious cabbage wedges are ready to go to zip-lock bags and kept in the fridge until needed.


Roasted Butternut Squash Soup | 烤葫蘆南瓜湯

Compare to the non-roasted version, roasted butternut squash instead brings a tremendous different in the flavour.  The caramelized s...